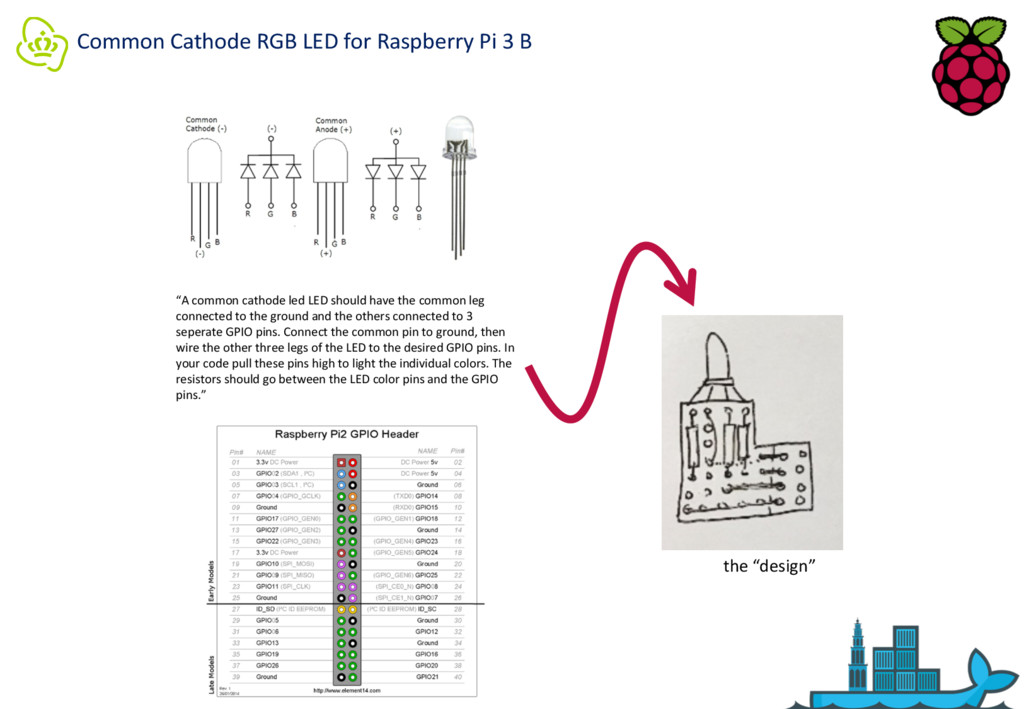
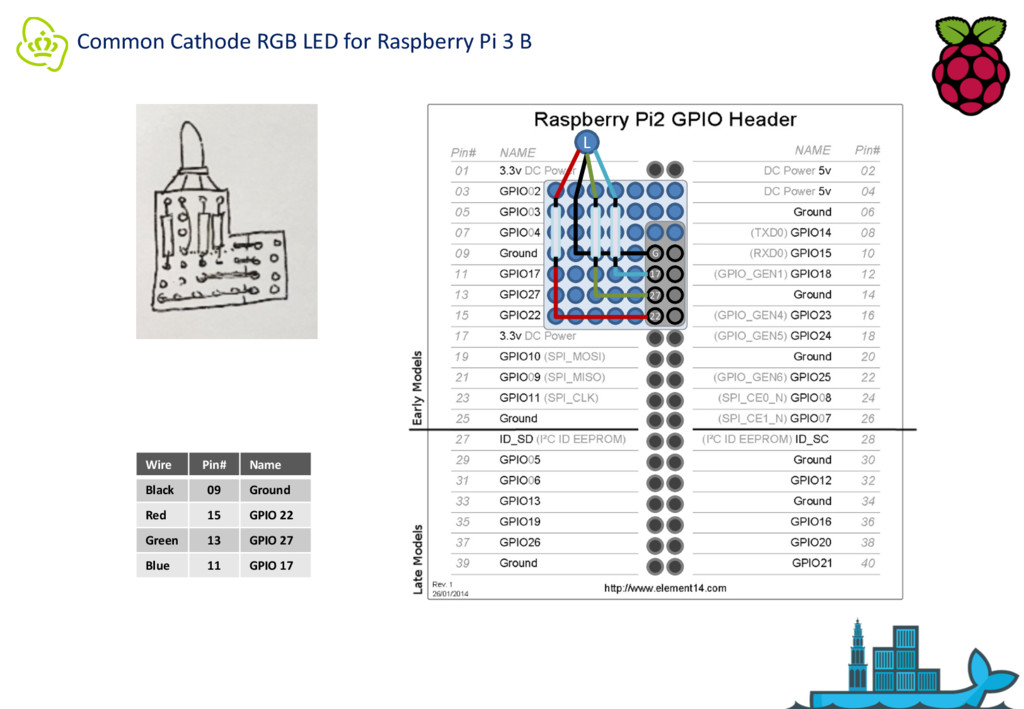
common cathode led LED should have the common leg connected to the ground and the others connected to 3 seperate GPIO pins. Connect the common pin to ground, then wire the other three legs of the LED to the desired GPIO pins. In your code pull these pins high to light the individual colors. The resistors should go between the LED color pins and the GPIO pins.” the “design”
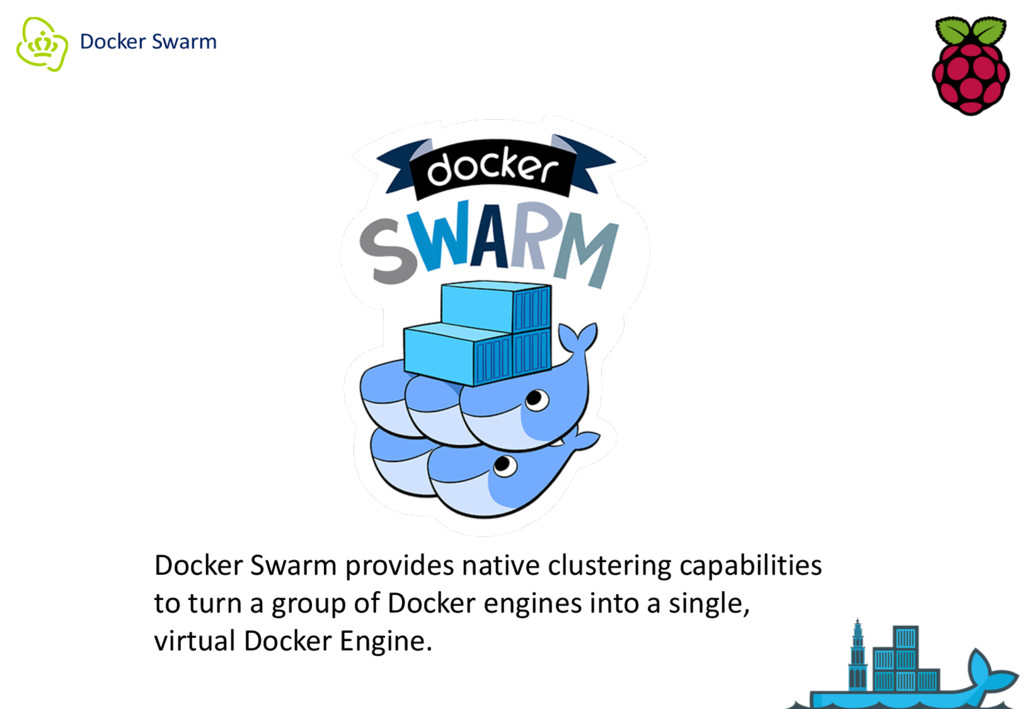
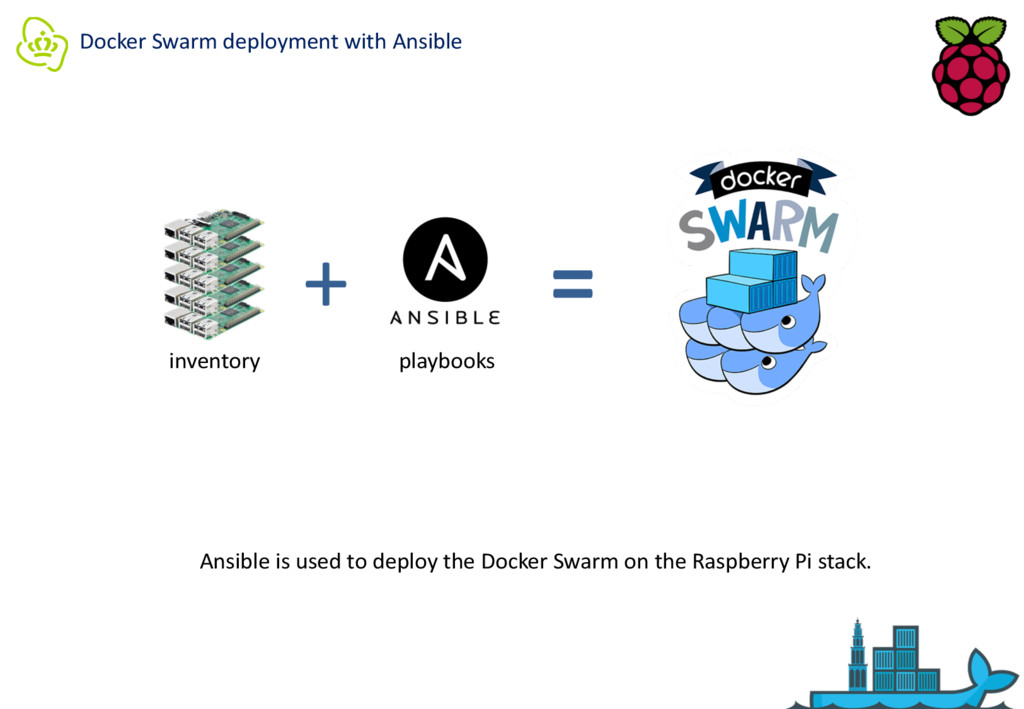
the Docker Engine CLI to create a swarm of Docker Engines where you can deploy application services. You don’t need additional orchestration software to create or manage a swarm. Decentralized design: Instead of handling differentiation between node roles at deployment time, the Docker Engine handles any specialization at runtime. You can deploy both kinds of nodes, managers and workers, using the Docker Engine. This means you can build an entire swarm from a single disk image. Declarative service model: Docker Engine uses a declarative approach to let you define the desired state of the various services in your application stack. For example, you might describe an application comprised of a web front end service with message queueing services and a database backend. Scaling: For each service, you can declare the number of tasks you want to run. When you scale up or down, the swarm manager automatically adapts by adding or removing tasks to maintain the desired state. Desired state reconciliation: The swarm manager node constantly monitors the cluster state and reconciles any differences between the actual state your expressed desired state. For example, if you set up a service to run 10 replicas of a container, and a worker machine hosting two of those replicas crashes, the manager will create two new replicas to replace the replicas that crashed. The swarm manager assigns the new replicas to workers that are running and available. Multi-host networking: You can specify an overlay network for your services. The swarm manager automatically assigns addresses to the containers on the overlay network when it initializes or updates the application. Service discovery: Swarm manager nodes assign each service in the swarm a unique DNS name and load balances running containers. You can query every container running in the swarm through a DNS server embedded in the swarm. Load balancing: You can expose the ports for services to an external load balancer. Internally, the swarm lets you specify how to distribute service containers between nodes. Secure by default: Each node in the swarm enforces TLS mutual authentication and encryption to secure communications between itself and all other nodes. You have the option to use self-signed root certificates or certificates from a custom root CA. Rolling updates: At rollout time you can apply service updates to nodes incrementally. The swarm manager lets you control the delay between service deployment to different sets of nodes. If anything goes wrong, you can roll-back a task to a previous version of the service.
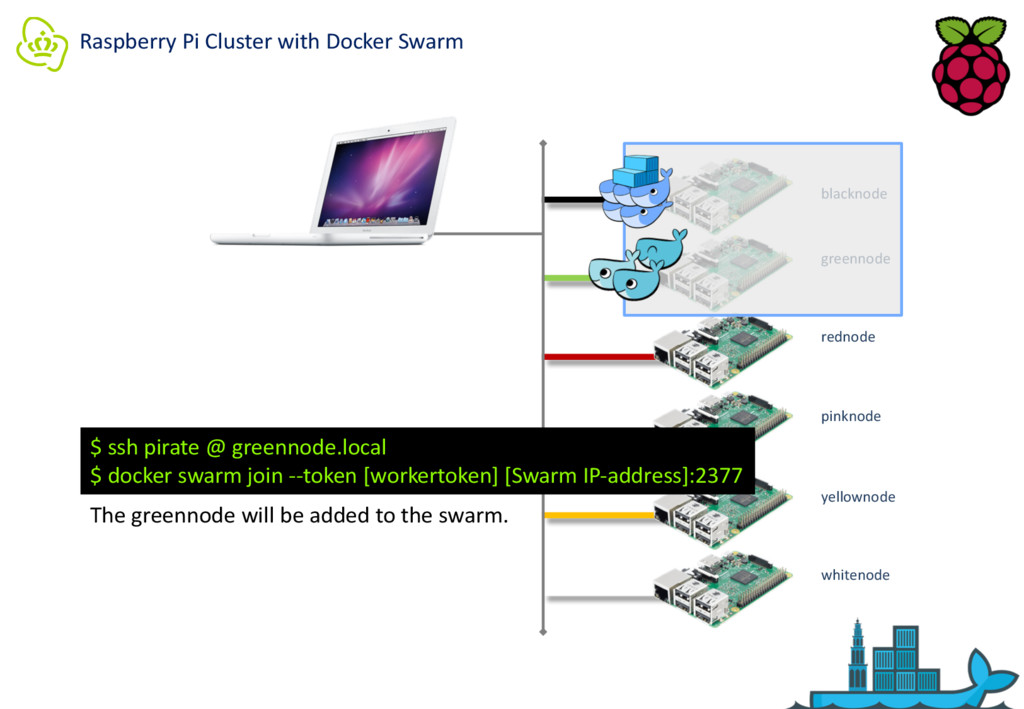
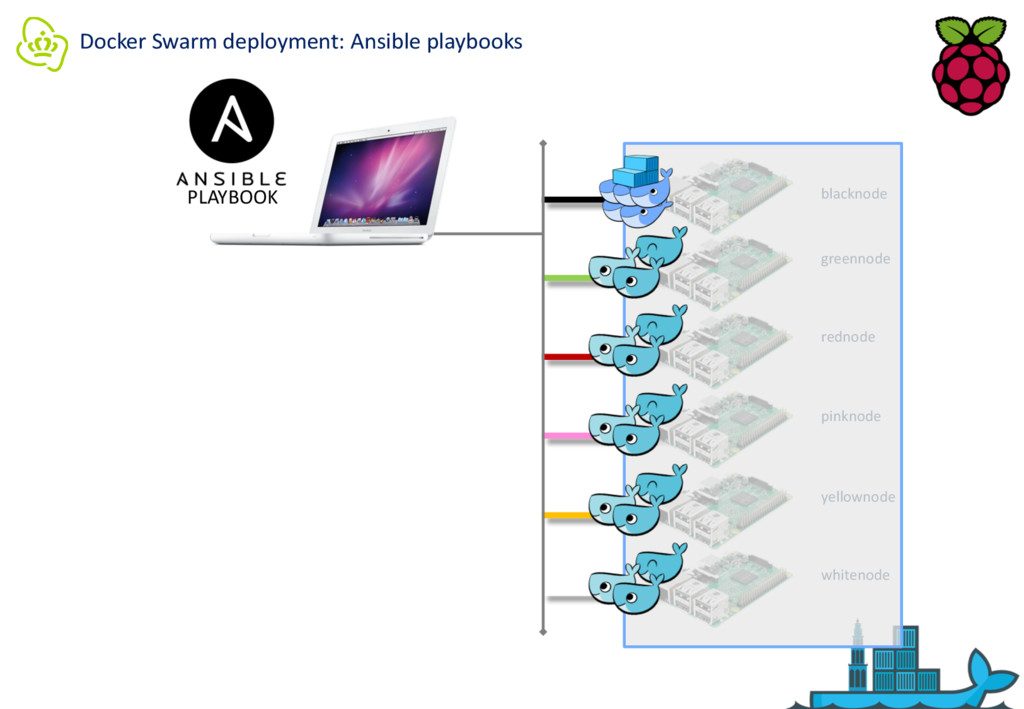
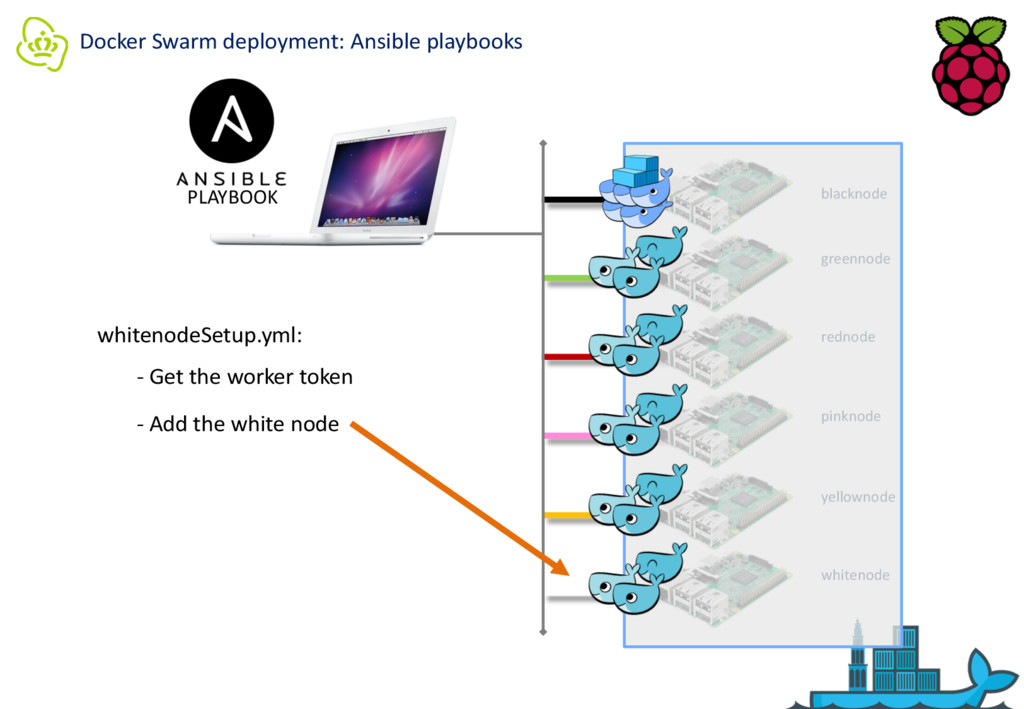
yellownode whitenode $ ssh pirate @ greennode.local $ docker swarm join --token [workertoken] [Swarm IP-address]:2377 The greennode will be added to the swarm.
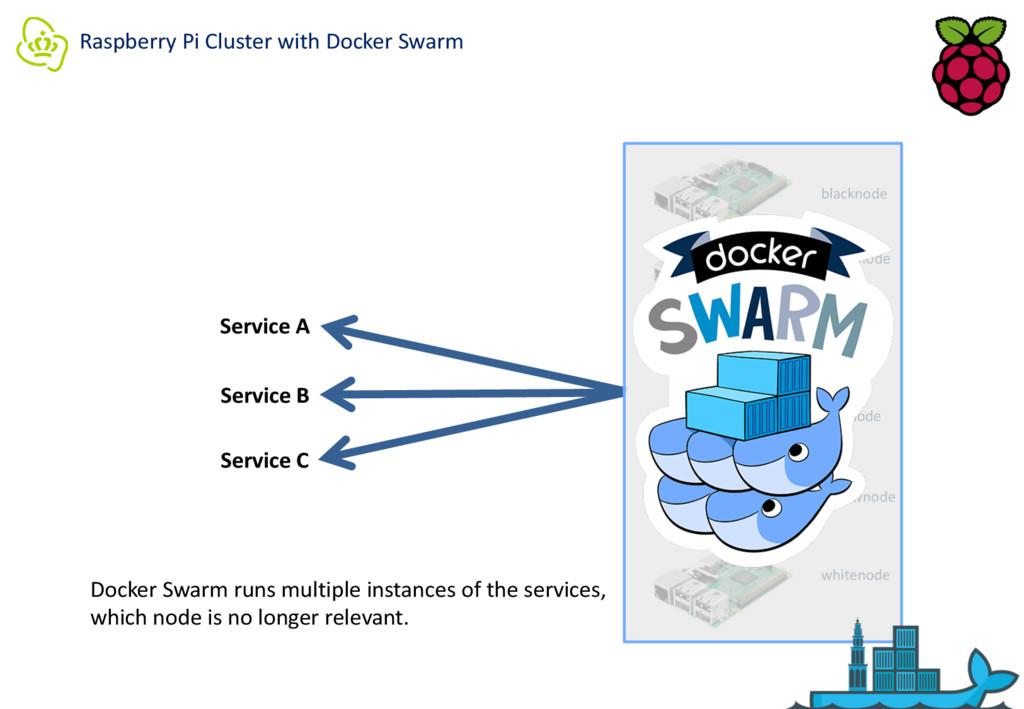
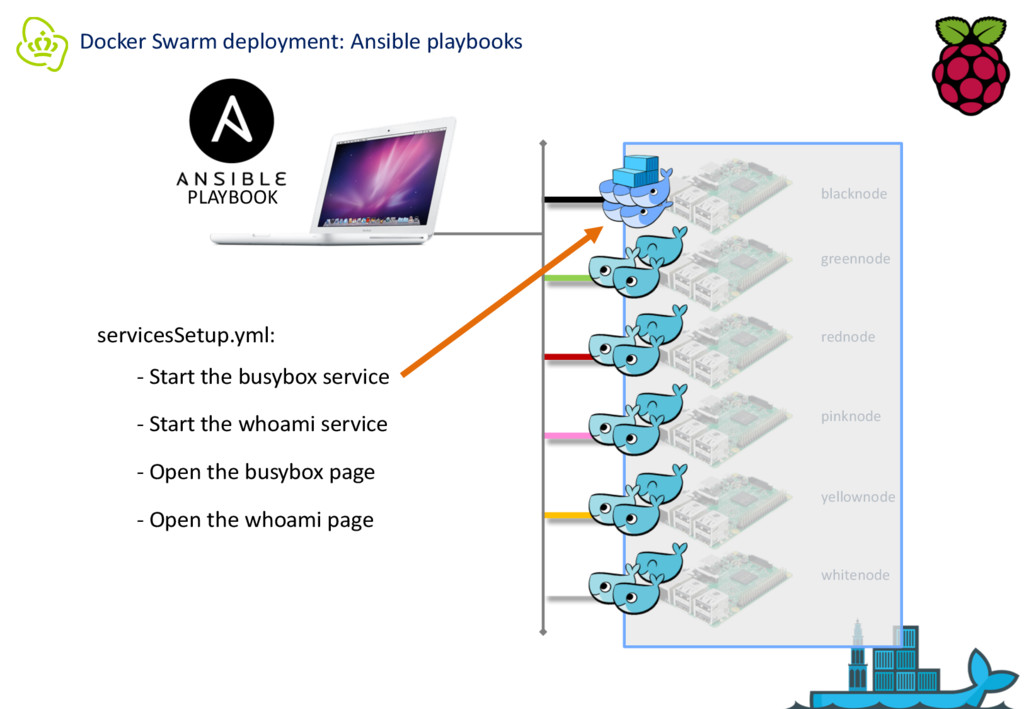
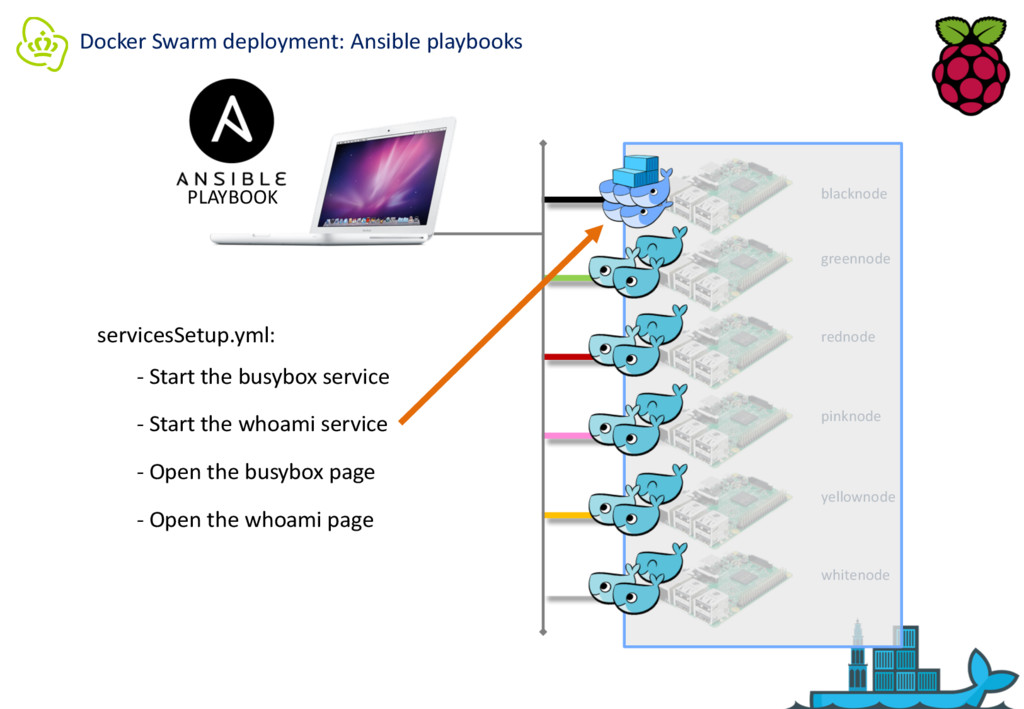
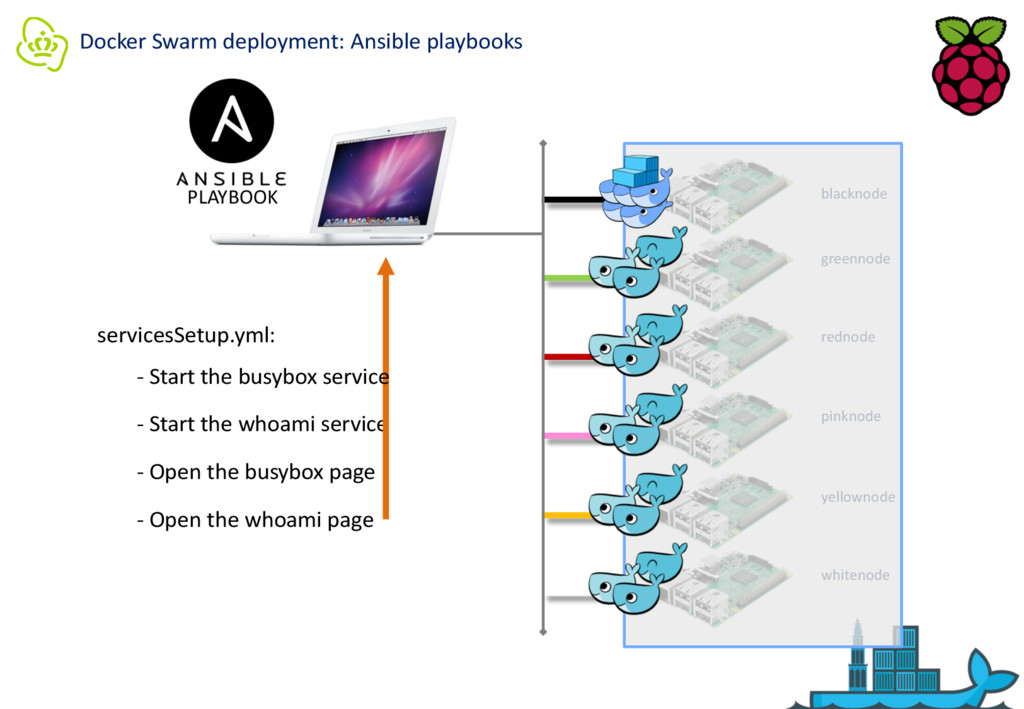
yellownode whitenode Service A Service B Service C $ ssh pirate @ blacknode.local $ docker service create --name busybox -p 8081:80 hypriot/rpi-busybox-httpd $ docker service create --name whoami -p 8082:8000 hypriot/rpi-whoami Create the services … on the cluster
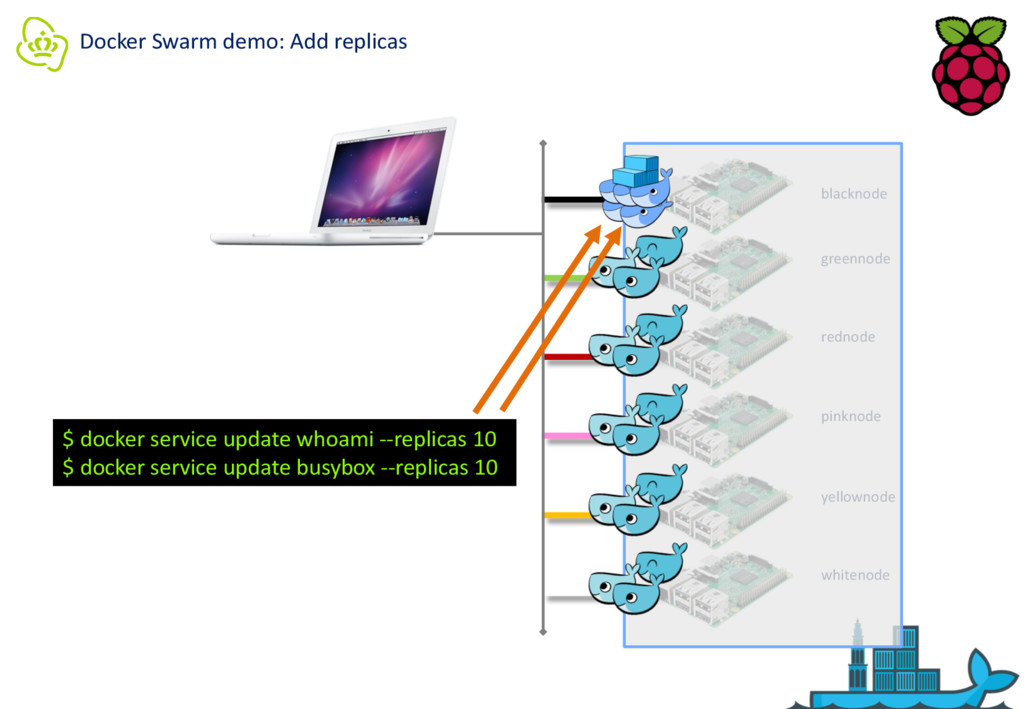
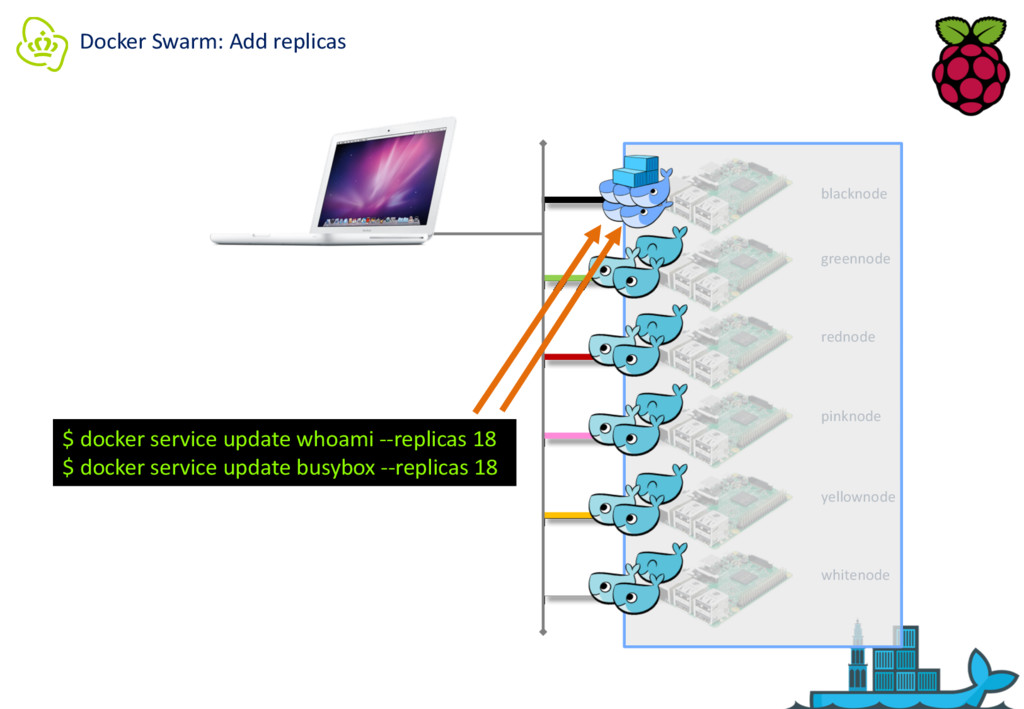
yellownode whitenode Service A Service B Service C $ ssh pirate @ blacknode.local $ docker service update busybox --replicas 12 $ docker service update whoami --replicas 12 Create extra instances (replicas) … on the cluster
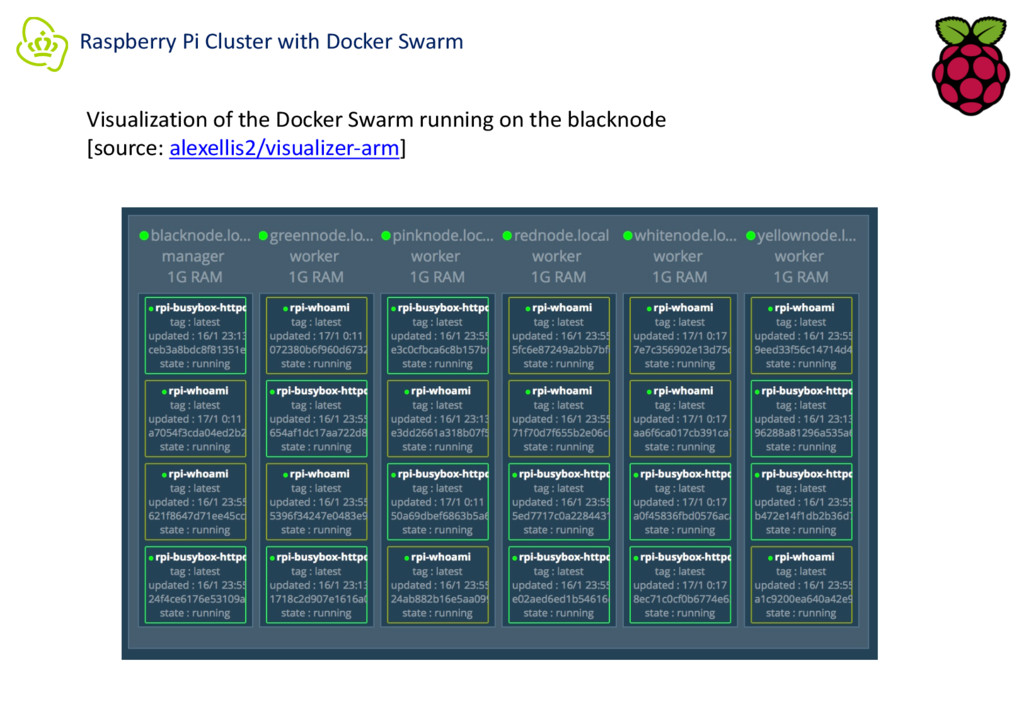
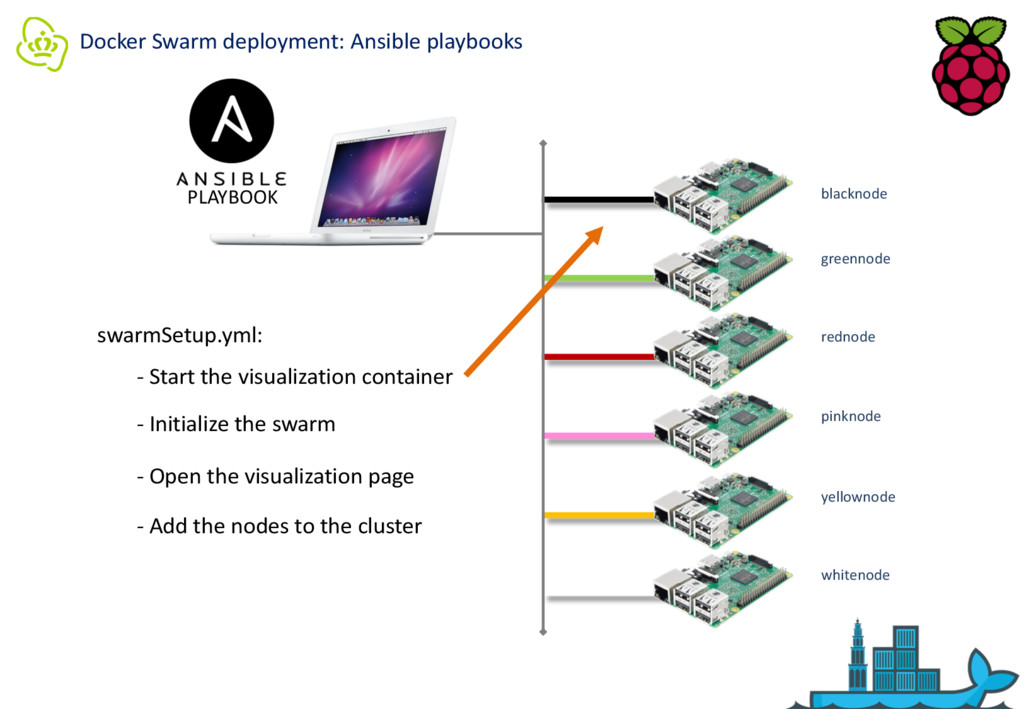
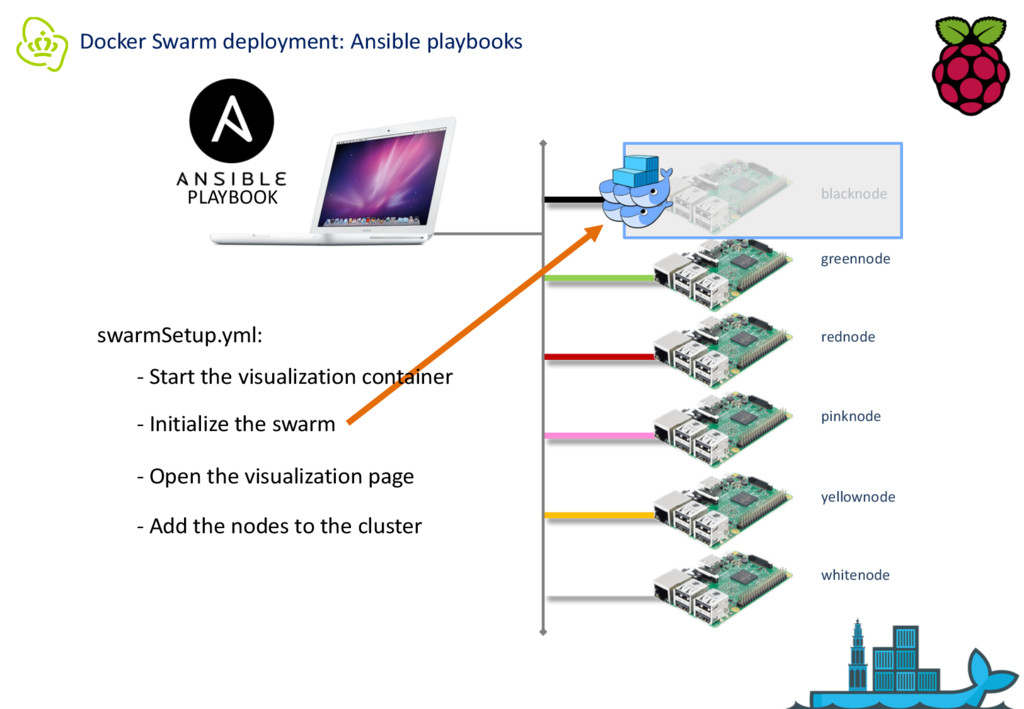
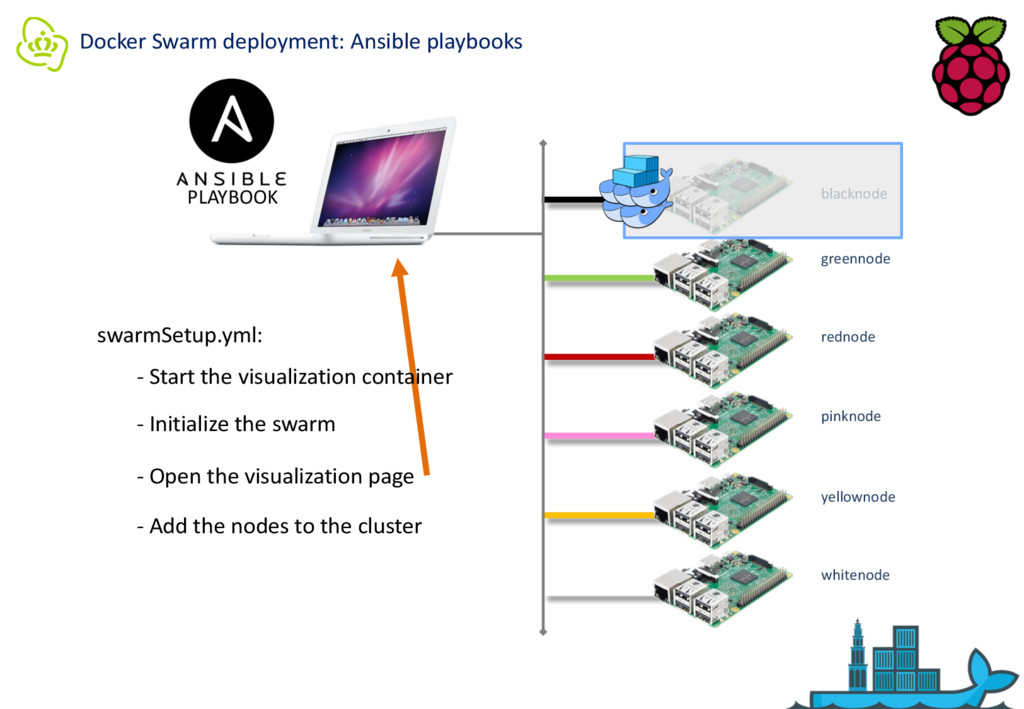
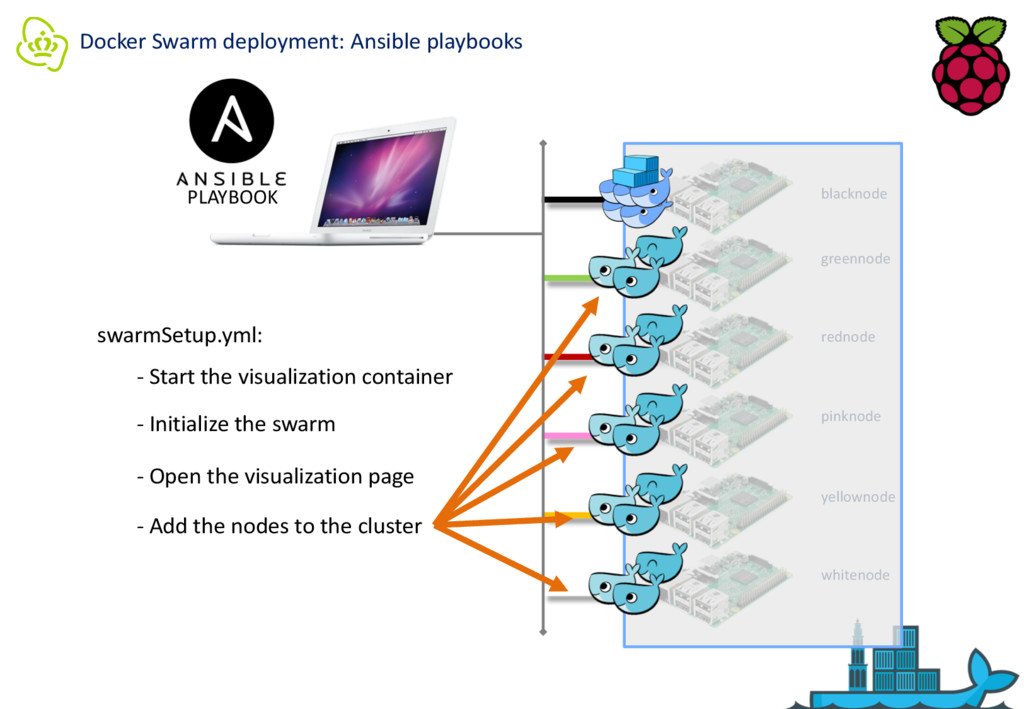
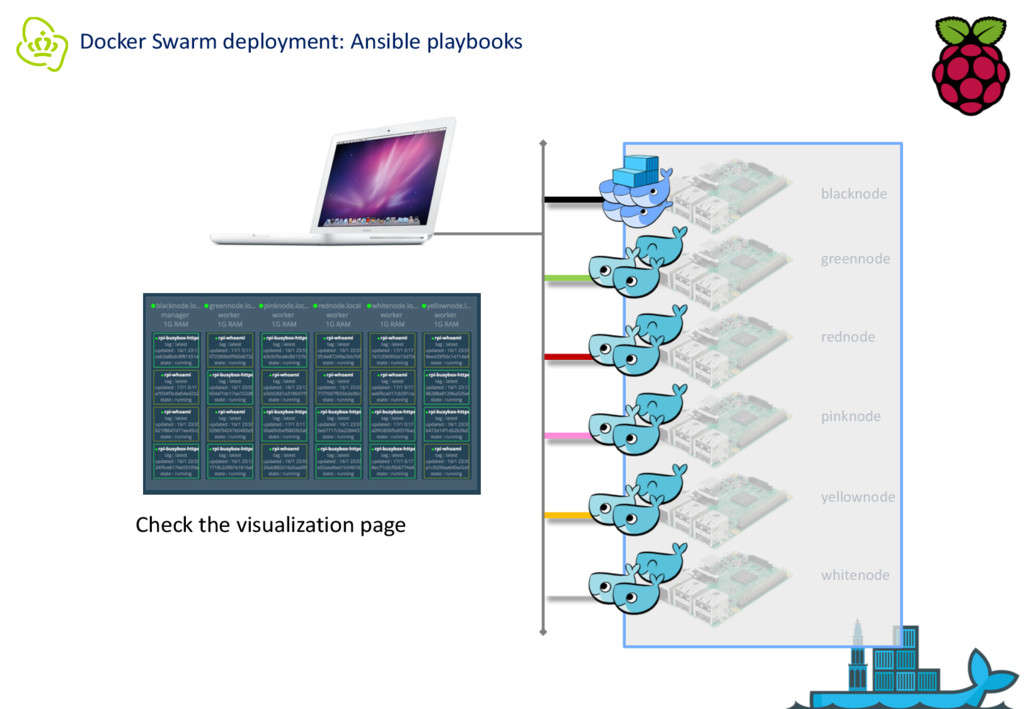
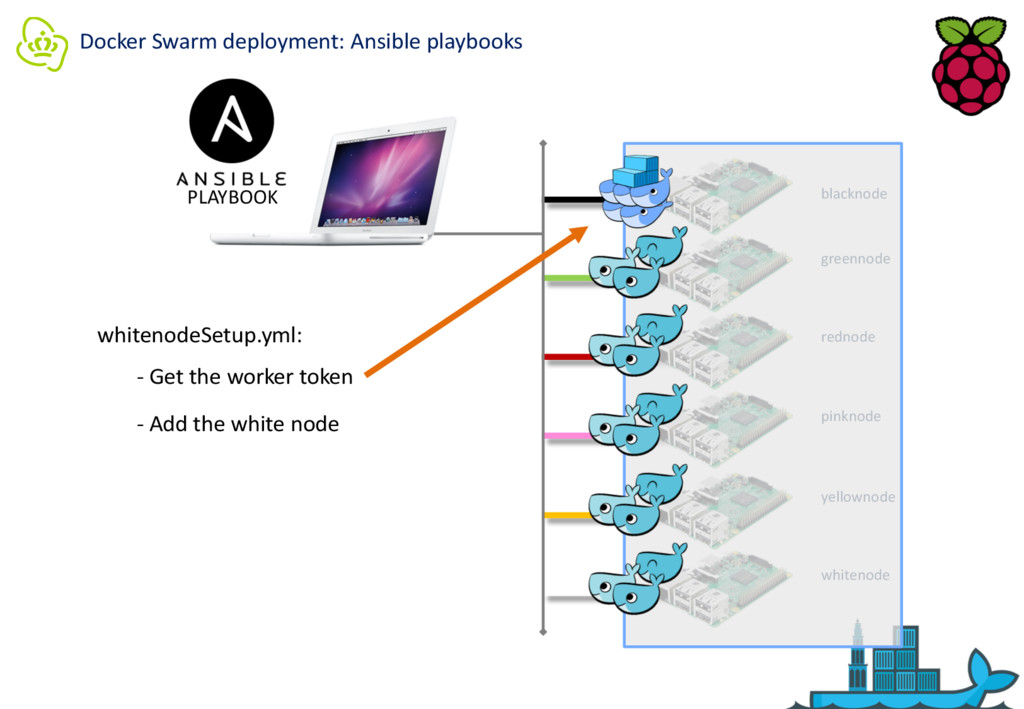
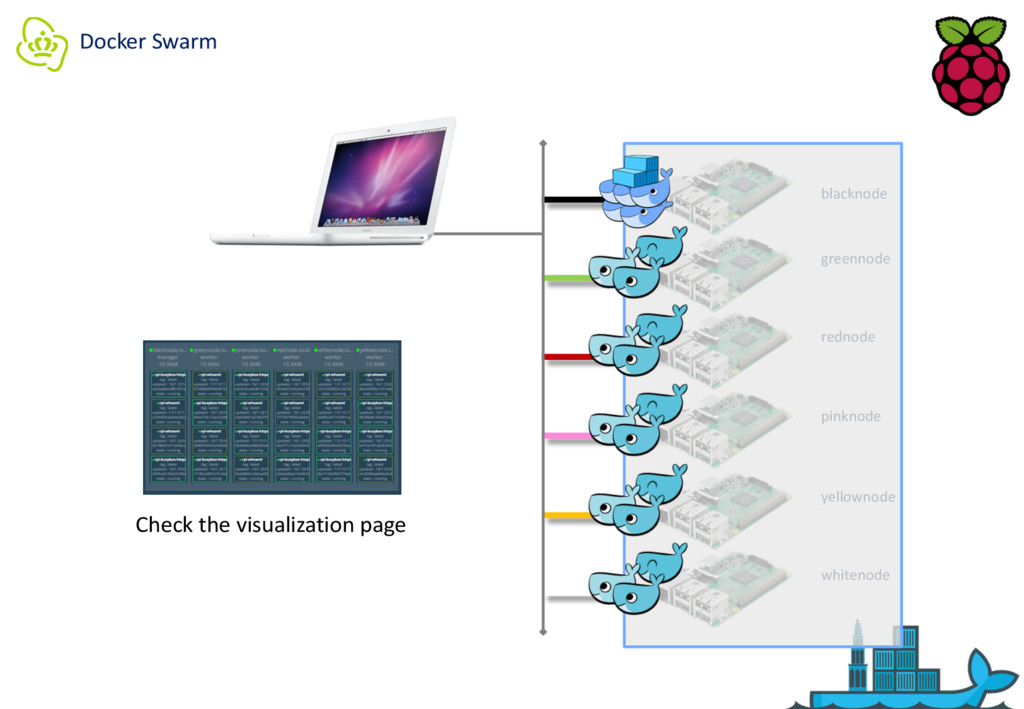
yellownode whitenode swarmSetup.yml: - Initialize the swarm - Open the visualization page - Add the nodes to the cluster - Start the visualization container
yellownode whitenode swarmSetup.yml: - Initialize the swarm - Open the visualization page - Add the nodes to the cluster - Start the visualization container
yellownode whitenode swarmSetup.yml: - Initialize the swarm - Open the visualization page - Add the nodes to the cluster - Start the visualization container
yellownode whitenode swarmSetup.yml: - Initialize the swarm - Open the visualization page - Add the nodes to the cluster - Start the visualization container
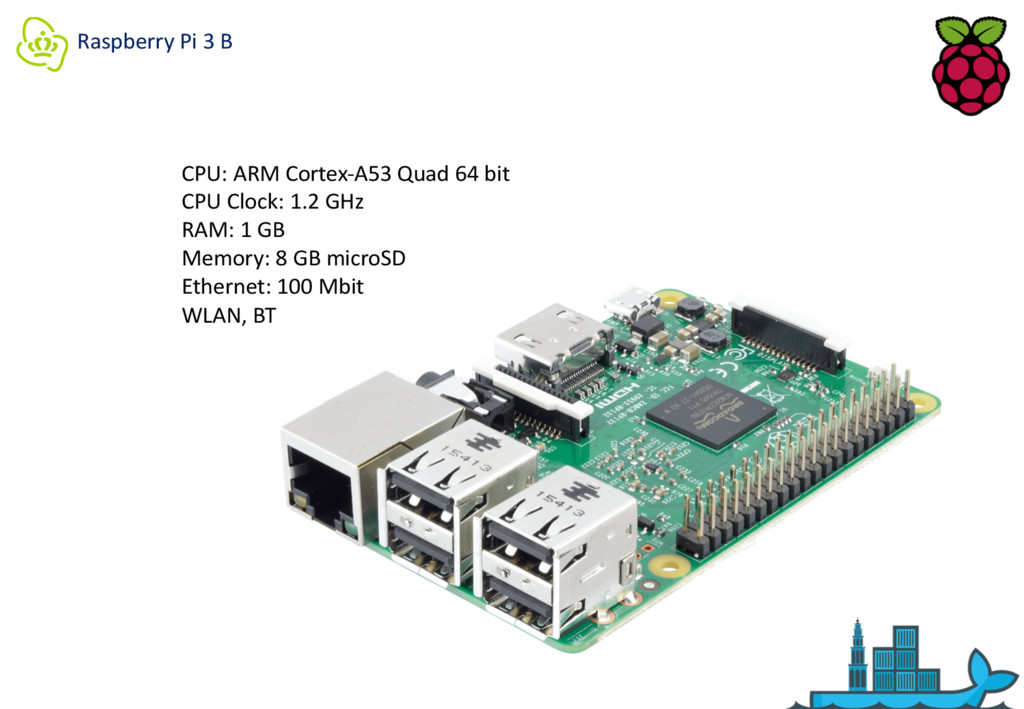
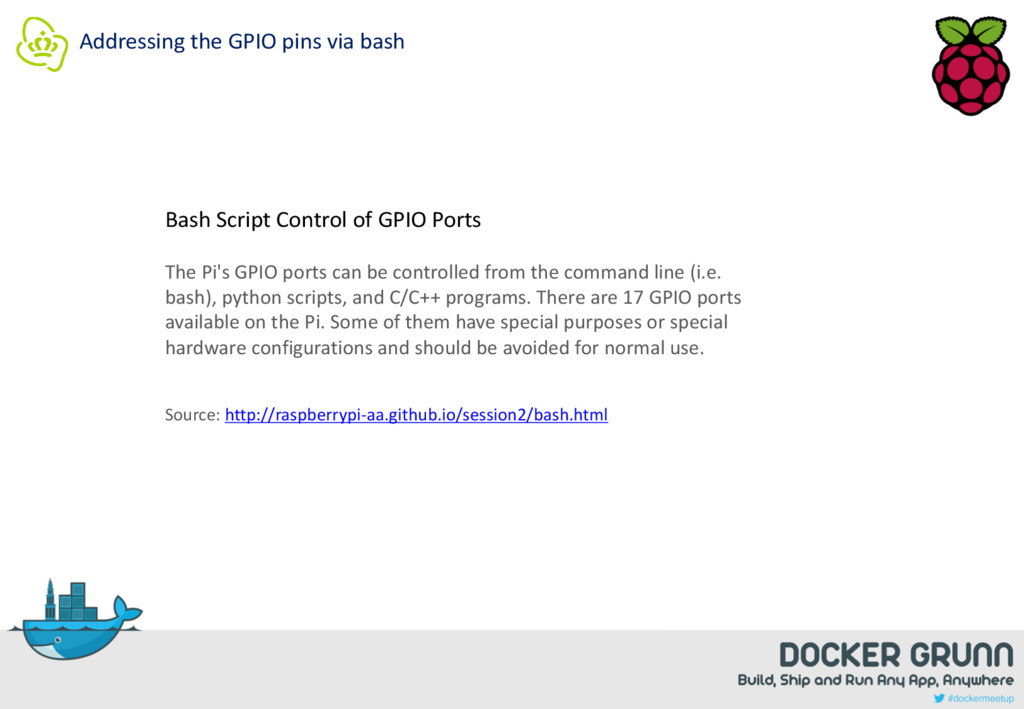
GPIO Ports The Pi's GPIO ports can be controlled from the command line (i.e. bash), python scripts, and C/C++ programs. There are 17 GPIO ports available on the Pi. Some of them have special purposes or special hardware configurations and should be avoided for normal use. Source: http://raspberrypi-aa.github.io/session2/bash.html
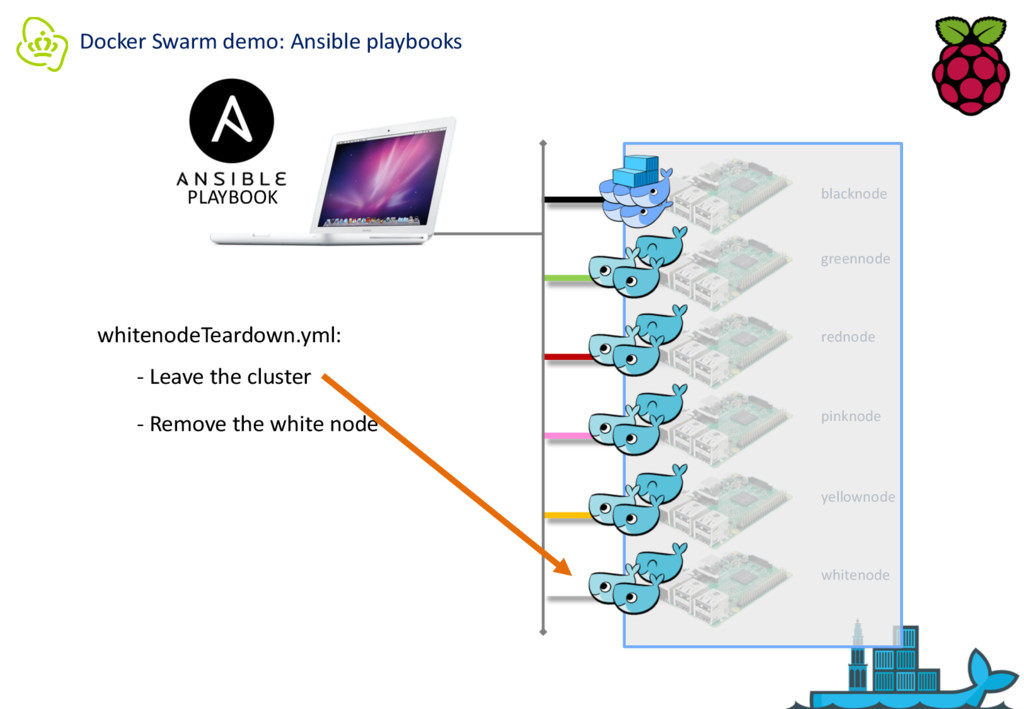
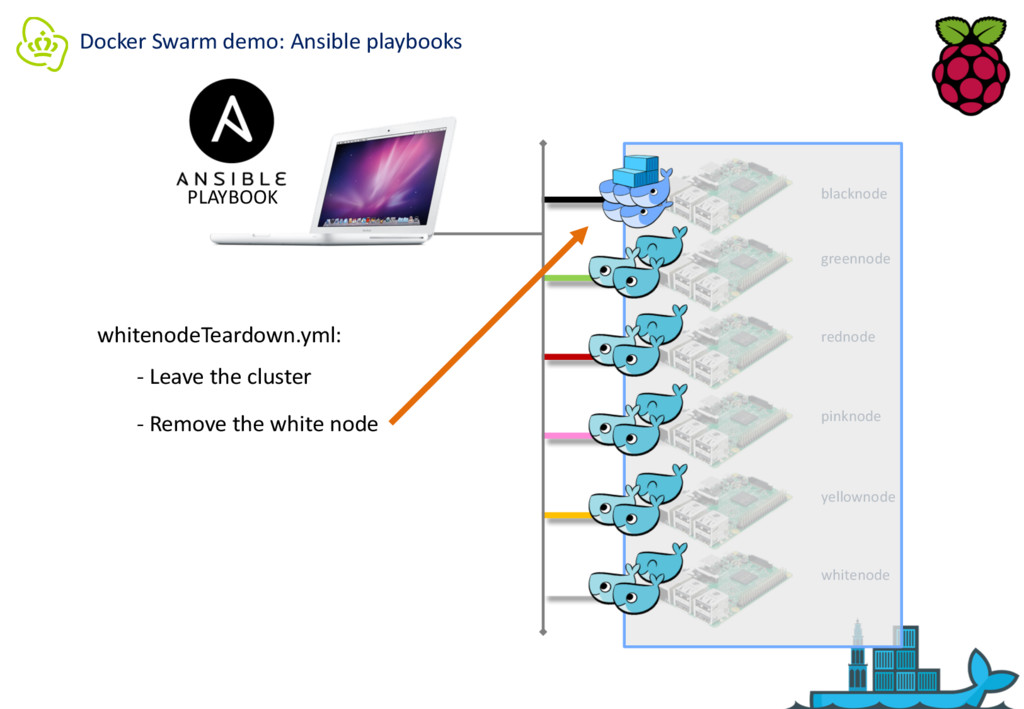
service update whoami --replicas 10 $ docker service update busybox --replicas 10 Remove the white node from the cluster: $ ansible-playbook -i inventory whitenodeTeardown.yml Add the white node to the cluster: $ ansible-playbook -i inventory whitenodeSetup.yml Add extra replicas: $ docker service update whoami --replicas 12 $ docker service update busybox --replicas 12
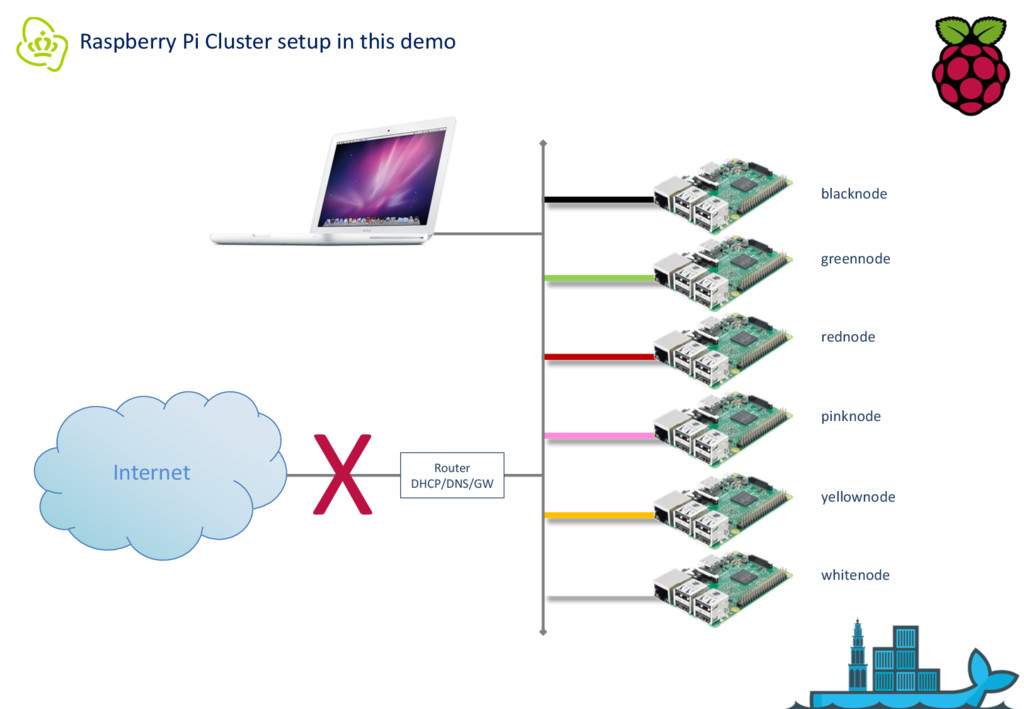
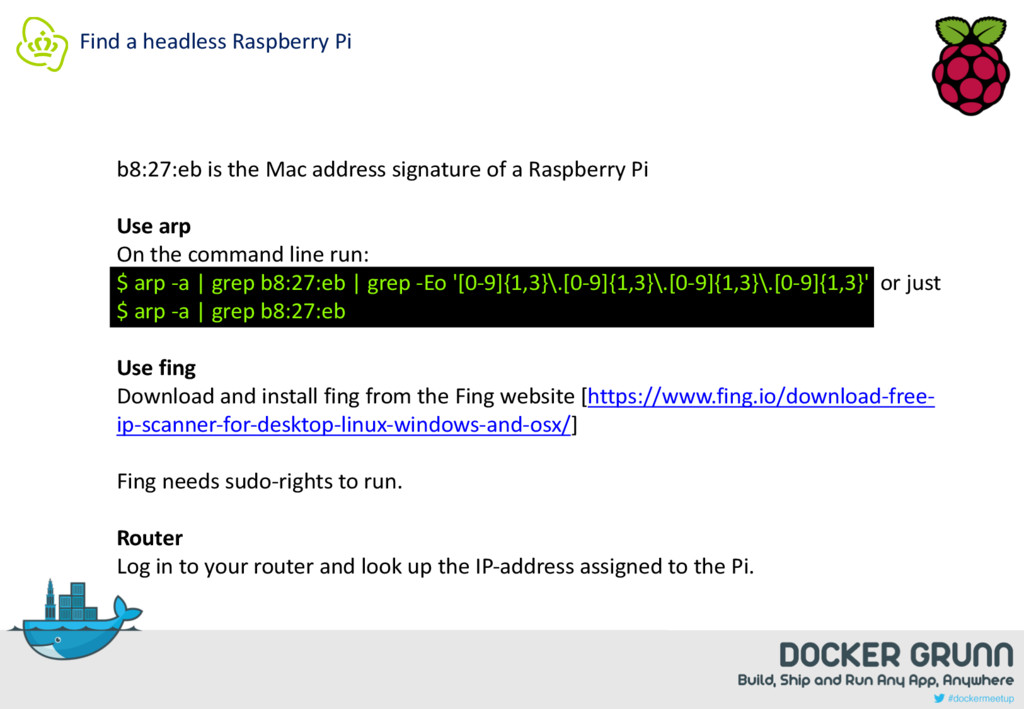
signature of a Raspberry Pi Use arp On the command line run: $ arp -a | grep b8:27:eb | grep -Eo '[0-9]{1,3}\.[0-9]{1,3}\.[0-9]{1,3}\.[0-9]{1,3}' or just $ arp -a | grep b8:27:eb Use fing Download and install fing from the Fing website [https://www.fing.io/download-free- ip-scanner-for-desktop-linux-windows-and-osx/] Fing needs sudo-rights to run. Router Log in to your router and look up the IP-address assigned to the Pi.
![Ansible playbooks 2/3 Swarm playtime: $ ssh [email protected] $ docker](https://files.speakerdeck.com/presentations/0ba13132eea14e74829d15eb6e59e9e1/slide_51.jpg)