Upgrade to Pro
— share decks privately, control downloads, hide ads and more …
Speaker Deck
Sign up for free
Menu
Search
Features
All features
Private URLs
Password Protection
Custom URLS
Scheduled publishing
Remove Branding
Restrict embedding
Deck Collections
Notes
Features
All features
Private URLs
Password Protection
Custom URLS
Scheduled publishing
Remove Branding
Restrict embedding
Deck Collections
Notes
Explore
Featured decks
Featured speakers
Programming
Technology
Storyboards
Explore
Featured decks
Featured speakers
Programming
Technology
Storyboards
Pricing
Search
Sign in
Sign up for free
GPUをフル活用するためのtf.dataの使い方
Search
masa-ita
November 02, 2019
Technology
1.1k
0
Share
Embed
Copy iframe code
Copy JS code
Copy link
Start on current slide
GPUをフル活用するためのtf.dataの使い方
masa-ita
November 02, 2019
More Decks by masa-ita
See All by masa-ita
Ollamaを使ったLocal Language Model活用法
itagakim
1
260
Run Instant NeRF on Docker
itagakim
1
2.4k
3D Clustering and Metric Learning
itagakim
0
430
Cloud TPUの使い方〜BigBirdの日本語学習済みモデルを作る〜
itagakim
0
780
多言語学習済みモデルmT5とは?
itagakim
1
810
AWSのGPUを安く使って TensorFlowモデルを訓練する方法
itagakim
0
430
最近の自然言語処理モデルの動向
itagakim
1
610
ディープラーニングで芸術はできるか? 〜生成系ネットワークの進展〜
itagakim
0
400
AWSとTerraform初心者が やってみたこと
itagakim
1
540
Other Decks in Technology
See All in Technology
AIをリアル世界に解き放つ 〜M5Stack×AIであなたのアイディアを手の平に〜
hamadakoji
1
400
「Learning Outcome」を書きたくない私が、Learning Outcomeと折り合いをつけるまで
mhlyc
0
150
S3 Filesで挑む! 八戸せんべい汁の食べ頃問題
usanchuu
0
160
LambdaWebFunctionsを試してみた / exploring-lambda-web-functions
koukihosaka
1
390
生成AI時代、PMは事業責任者に進化するともっと面白い〜PMだからこそ事業構造を動かせる時代に〜
kakehashi
PRO
0
610
AI駆動開発における開発環境のセキュリティの考え方
yamahiro
2
470
Kiro Crewで「みのるん式」仕事術やってみた
minorun365
PRO
3
1.1k
Railsで挑む大量データ永続化 〜600億件を永続化するための設計とボトルネックとの戦い〜
occhi
1
1.1k
Active Record Connection Adaptersにおける長年の課題に再び取り組む
yahonda
0
430
How to teach your AI Agent with Agent skills
linedevth
0
120
顧客価値を追いかけたら、プライシングにたどり着いた
sansantech
PRO
2
780
QAエンジニアがSoutherを使ってみたの〜10分でわかるSouther〜
mhlyc
0
110
Featured
See All Featured
Deep Space Network (abreviated)
tonyrice
0
380
Exploring the relationship between traditional SERPs and Gen AI search
raygrieselhuber
PRO
4
4.4k
The Mindset for Success: Future Career Progression
greggifford
PRO
0
540
Lessons Learnt from Crawling 1000+ Websites
charlesmeaden
PRO
1
1.6k
The agentic SEO stack - context over prompts
schlessera
0
970
Everyday Curiosity
cassininazir
0
360
The Invisible Side of Design
smashingmag
301
52k
We Analyzed 250 Million AI Search Results: Here's What I Found
joshbly
2
2.1k
For a Future-Friendly Web
brad_frost
184
10k
Writing Fast Ruby
sferik
630
63k
Crafting Experiences
bethany
1
390
Beyond borders and beyond the search box: How to win the global "messy middle" with AI-driven SEO
davidcarrasco
3
280
Transcript
GPUをフル活⽤するた めの TF.DATA の使い⽅ 板垣 正敏 2019/11/2 Python機械学習勉強会in新潟 & TFUG
Niigata 合同勉強会
TF.DATAとは︖
機械学習モデルへの⼊⼒パ イプライン構築ツール ▪ 機械学習モデルにデータを供給するためのパイプラインを 構成する ▪ 下記のような操作を⾏う – データの読み込み –
データのデコード – データの前処理 – データのシャッフル – データの繰り返し – データのキャッシュ – データのバッチ化
tf.data.Datasetとサブクラス ▪ tf.data.Dataset – tf.data.TFRecordDataset – tf.data.TextLineDataset – tf.data.FixedLengthDataset
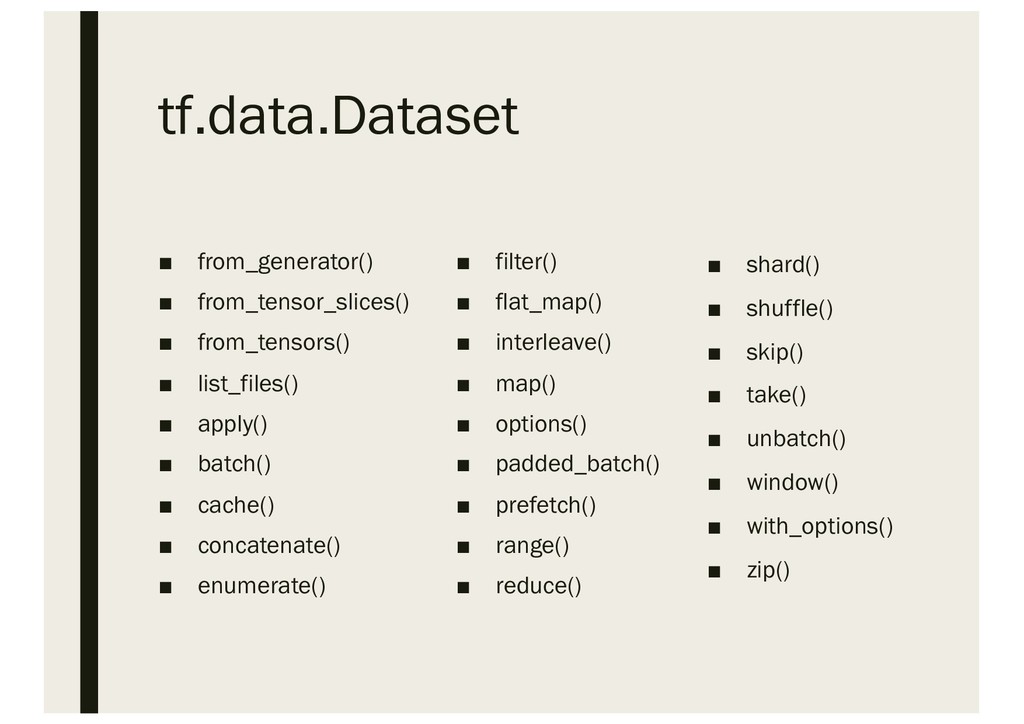
tf.data.Dataset ▪ from_generator() ▪ from_tensor_slices() ▪ from_tensors() ▪ list_files() ▪
apply() ▪ batch() ▪ cache() ▪ concatenate() ▪ enumerate() ▪ filter() ▪ flat_map() ▪ interleave() ▪ map() ▪ options() ▪ padded_batch() ▪ prefetch() ▪ range() ▪ reduce() ▪ shard() ▪ shuffle() ▪ skip() ▪ take() ▪ unbatch() ▪ window() ▪ with_options() ▪ zip()
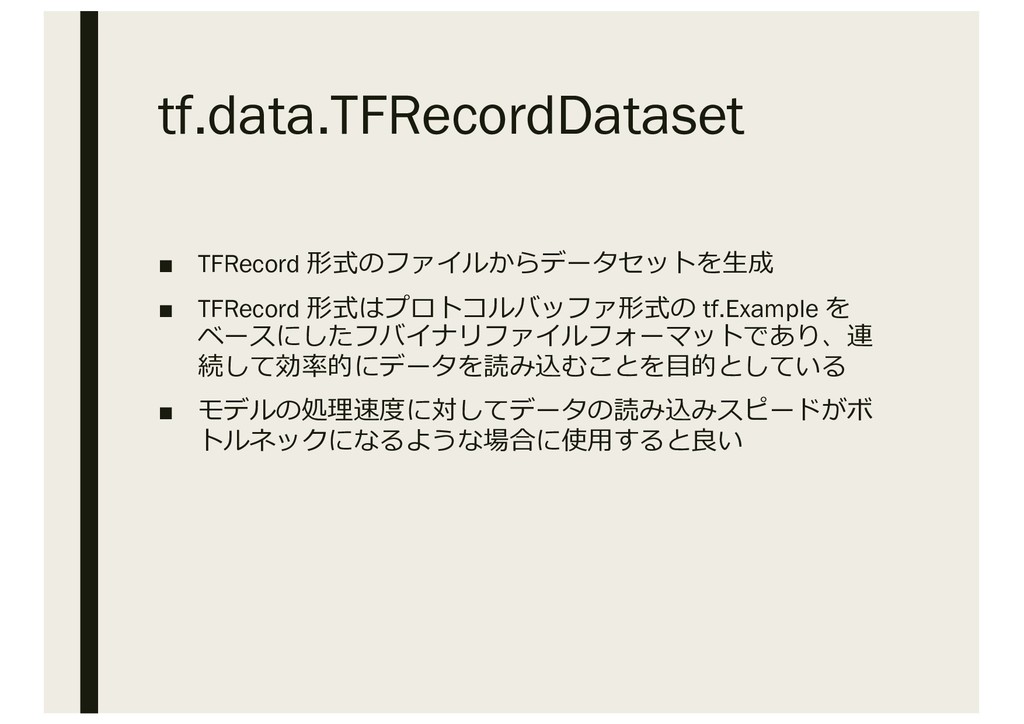
tf.data.TFRecordDataset ▪ TFRecord 形式のファイルからデータセットを⽣成 ▪ TFRecord 形式はプロトコルバッファ形式の tf.Example を ベースにしたフバイナリファイルフォーマットであり、連
続して効率的にデータを読み込むことを⽬的としている ▪ モデルの処理速度に対してデータの読み込みスピードがボ トルネックになるような場合に使⽤すると良い
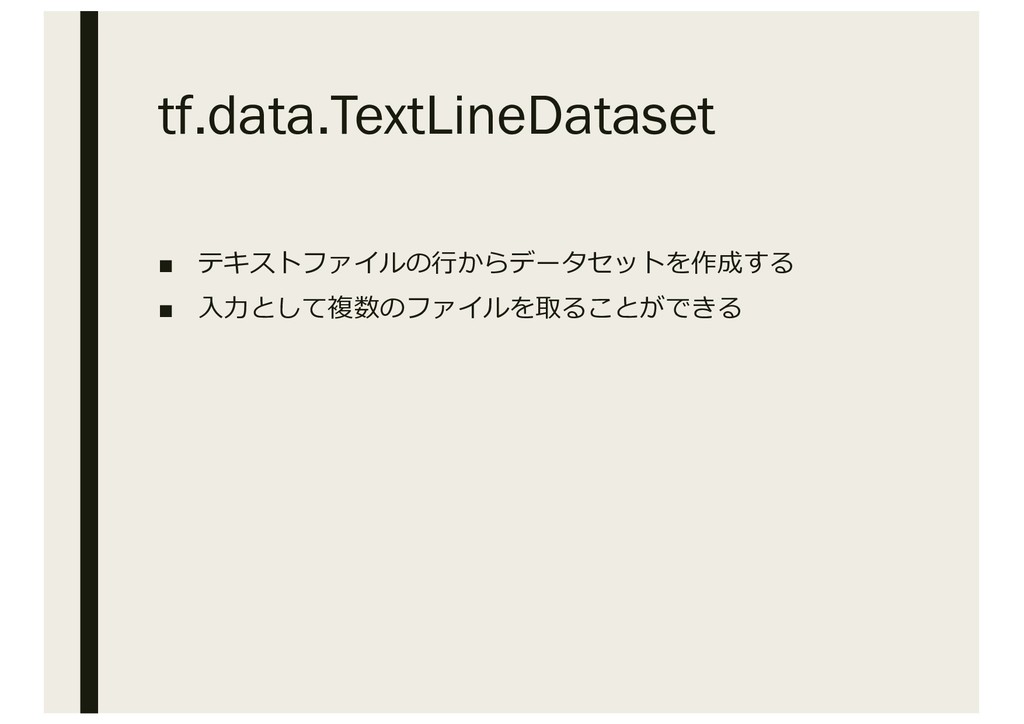
tf.data.TextLineDataset ▪ テキストファイルの⾏からデータセットを作成する ▪ ⼊⼒として複数のファイルを取ることができる
tf.data.FixedLengthRecordDataset ▪ 固定⻑のバイナリファイルからデータを読み込む
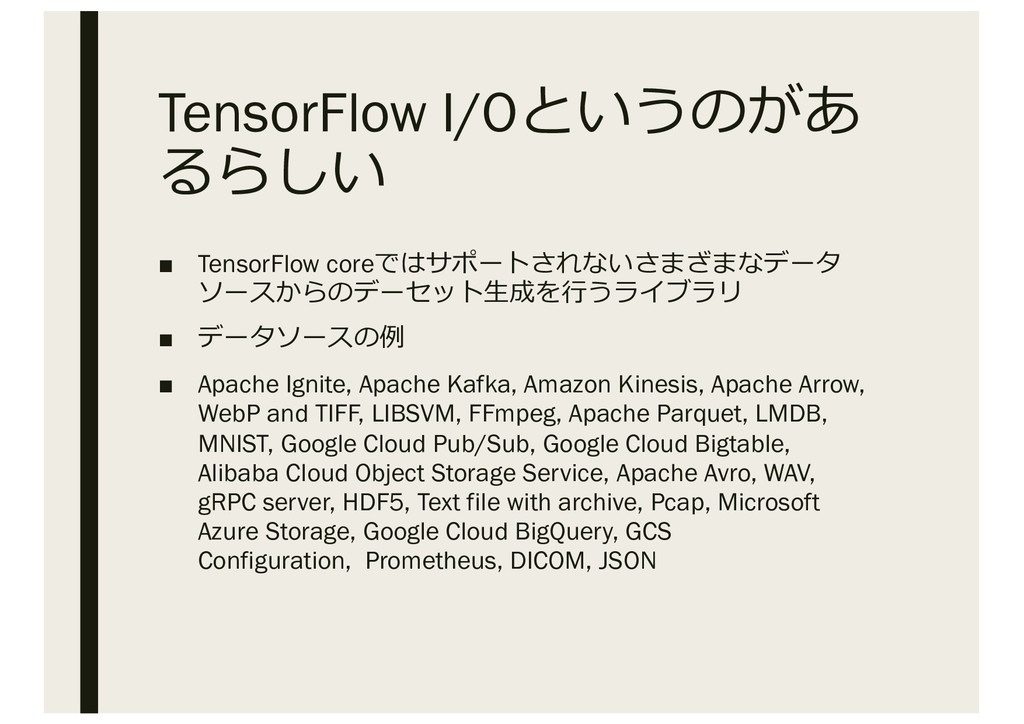
TensorFlow I/Oというのがあ るらしい ▪ TensorFlow coreではサポートされないさまざまなデータ ソースからのデーセット⽣成を⾏うライブラリ ▪ データソースの例 ▪
Apache Ignite, Apache Kafka, Amazon Kinesis, Apache Arrow, WebP and TIFF, LIBSVM, FFmpeg, Apache Parquet, LMDB, MNIST, Google Cloud Pub/Sub, Google Cloud Bigtable, Alibaba Cloud Object Storage Service, Apache Avro, WAV, gRPC server, HDF5, Text file with archive, Pcap, Microsoft Azure Storage, Google Cloud BigQuery, GCS Configuration, Prometheus, DICOM, JSON
GPU環境でのベスト プラクティス https://www.tensorflow.org/guide/data_performance より
パイプラインが必要な理由 ▪ パイプラインがない場合 ▪ パイプライン化後(prefetch活⽤)
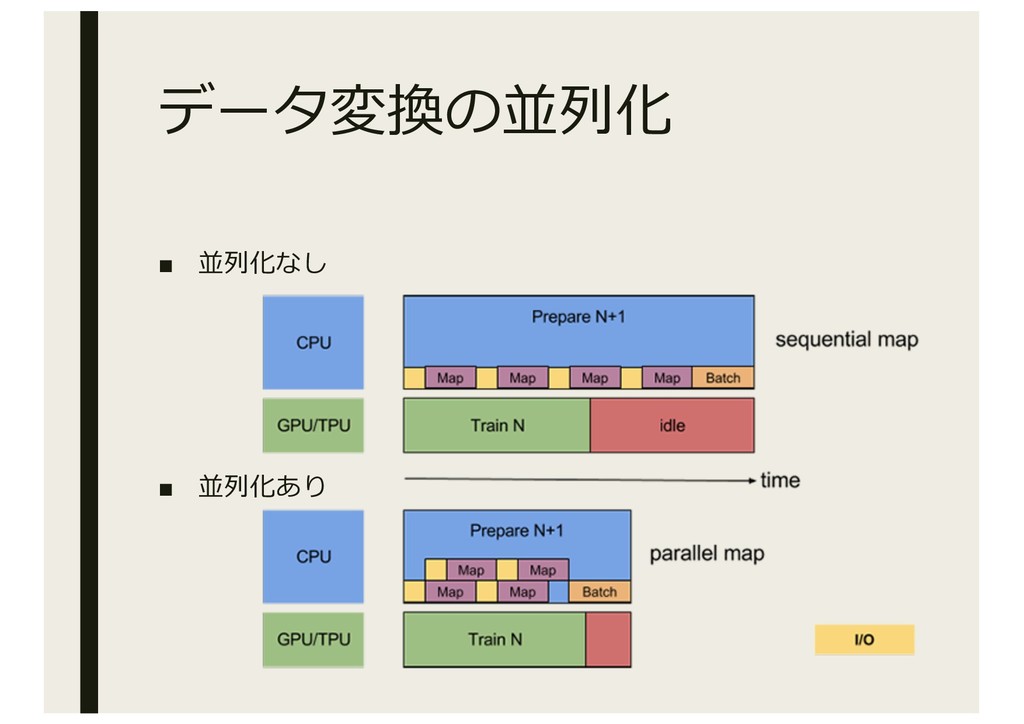
データ変換の並列化 ▪ 並列化なし ▪ 並列化あり
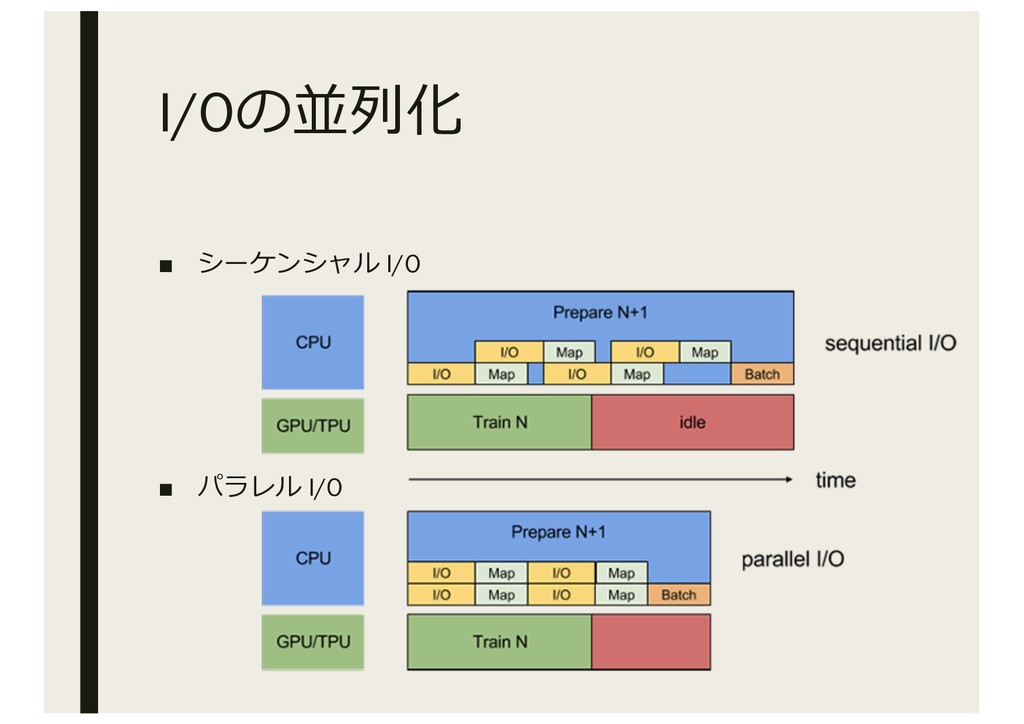
I/Oの並列化 ▪ シーケンシャル I/O ▪ パラレル I/O
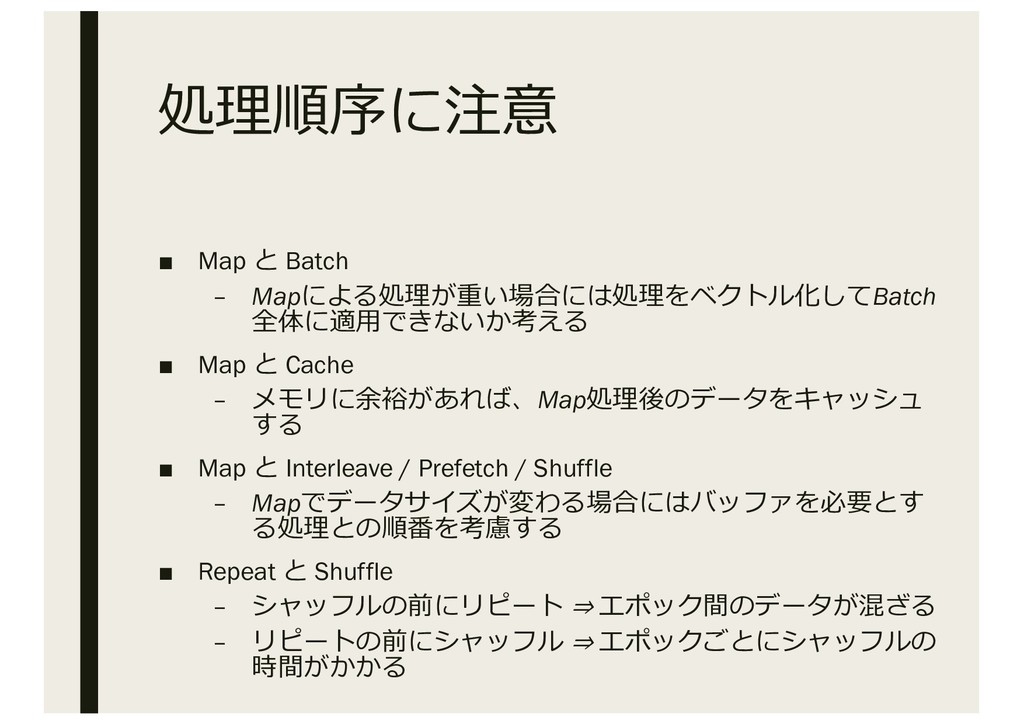
処理順序に注意 ▪ Map と Batch – Mapによる処理が重い場合には処理をベクトル化してBatch 全体に適⽤できないか考える ▪ Map
と Cache – メモリに余裕があれば、Map処理後のデータをキャッシュ する ▪ Map と Interleave / Prefetch / Shuffle – Mapでデータサイズが変わる場合にはバッファを必要とす る処理との順番を考慮する ▪ Repeat と Shuffle – シャッフルの前にリピート ⇒ エポック間のデータが混ざる – リピートの前にシャッフル ⇒ エポックごとにシャッフルの 時間がかかる
コーディング例
import tensorflow as tf import pathlib import time import random
print(tf.__version__) # 画像データのダウンロード data_root_orig = tf.keras.utils.get_file( origin='https://storage.googleapis.com/download.tensorflow.org/example_images/f lower_photos.tgz', fname='flower_photos', untar=True) data_root = pathlib.Path(data_root_orig) # 画像ファイルの⼀覧作成(画像はクラスごとのディレクトリに⼊っている) all_image_paths = list(data_root.glob('*/*')) all_image_paths = [str(path) for path in all_image_paths] random.shuffle(all_image_paths) image_count = len(all_image_paths) 画像分類のサンプル(1/3)
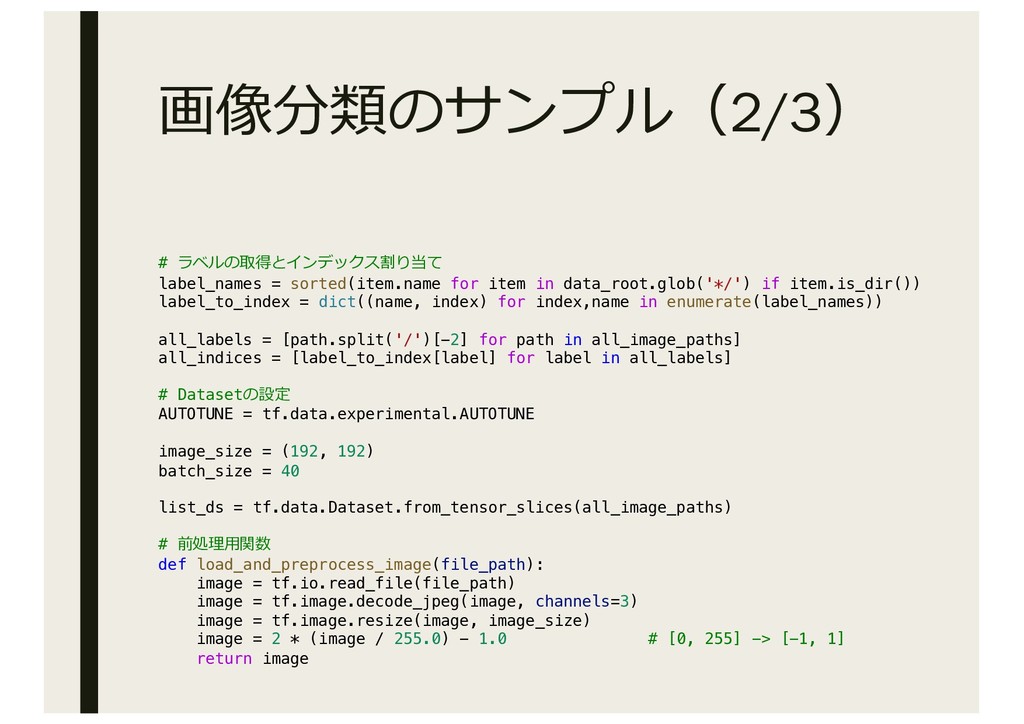
# ラベルの取得とインデックス割り当て label_names = sorted(item.name for item in data_root.glob('*/') if
item.is_dir()) label_to_index = dict((name, index) for index,name in enumerate(label_names)) all_labels = [path.split('/')[-2] for path in all_image_paths] all_indices = [label_to_index[label] for label in all_labels] # Datasetの設定 AUTOTUNE = tf.data.experimental.AUTOTUNE image_size = (192, 192) batch_size = 40 list_ds = tf.data.Dataset.from_tensor_slices(all_image_paths) # 前処理⽤関数 def load_and_preprocess_image(file_path): image = tf.io.read_file(file_path) image = tf.image.decode_jpeg(image, channels=3) image = tf.image.resize(image, image_size) image = 2 * (image / 255.0) - 1.0 # [0, 255] -> [-1, 1] return image 画像分類のサンプル(2/3)
# Datasetの組み⽴て image_ds = list_ds.map(load_and_preprocess_image, num_parallel_calls=AUTOTUNE) indices_ds = tf.data.Dataset.from_tensor_slices(all_indices) ds
= list_ds.zip((image_ds, indices_ds)) ¥ .cache() ¥ .shuffle(buffer_size=image_count) ¥ .batch(batch_size) ¥ .prefetch(buffer_size=AUTOTUNE) # モデルの構築 mobile_net = tf.keras.applications.MobileNetV2(input_shape=(192, 192, 3), include_top=False) mobile_net.trainable=False model = tf.keras.Sequential([ mobile_net, tf.keras.layers.GlobalAveragePooling2D(), tf.keras.layers.Dense(len(label_names), activation='softmax')]) # モデルのコンパイル model.compile(loss='sparse_categorical_crossentropy', optimizer='adam', metrics=['acc']) # モデルの訓練 model.fit(ds, epochs=10, verbose=2) 画像分類のサンプル(3/3)
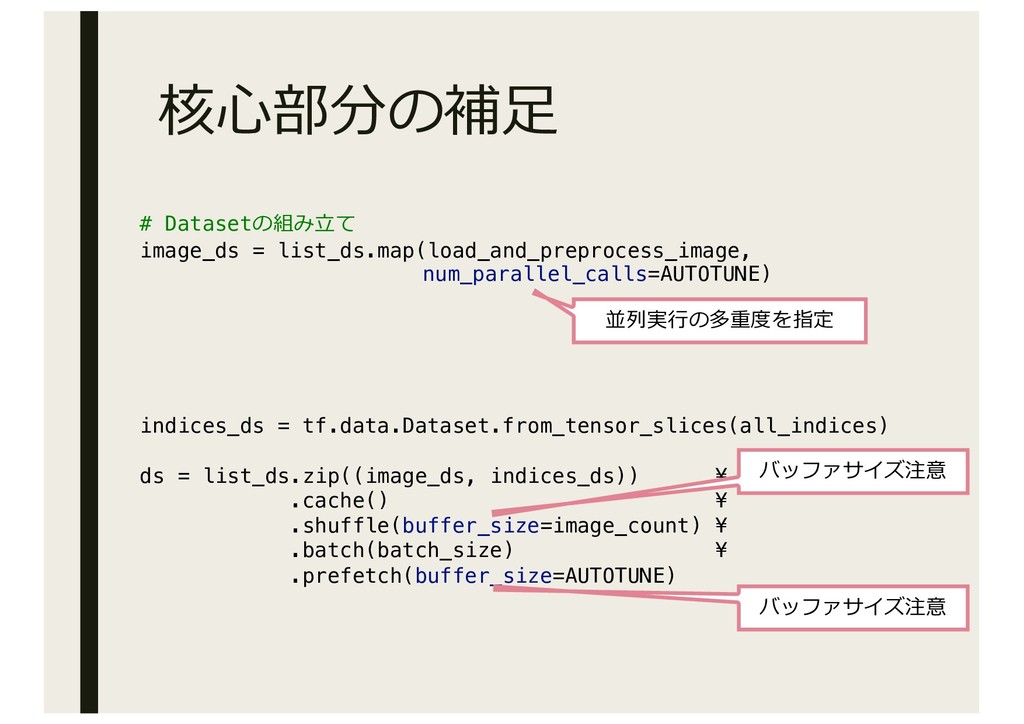
# Datasetの組み⽴て image_ds = list_ds.map(load_and_preprocess_image, num_parallel_calls=AUTOTUNE) indices_ds = tf.data.Dataset.from_tensor_slices(all_indices) ds
= list_ds.zip((image_ds, indices_ds)) ¥ .cache() ¥ .shuffle(buffer_size=image_count) ¥ .batch(batch_size) ¥ .prefetch(buffer_size=AUTOTUNE) 並列実⾏の多重度を指定 バッファサイズ注意 バッファサイズ注意 核⼼部分の補⾜
ベンチマーク
実験環境 ▪ CPU: Intel(R) Core(TM) i9-9900K CPU @ 3.60GHz ▪
Memory: 32GB ▪ GPU: NVIDIA GeForce RTX 2080 Ti メモリ11GB ▪ OS: Ubuntu Desktop 18.04.2 ▪ NVIDIA Driver Version: 418.87.01 CUDA Version: 10.0 ▪ Storage: NVMe 480GB ▪ docker ce/nvidia-docker2 ▪ tensorflow/tensorflow:latest-gpu-py3
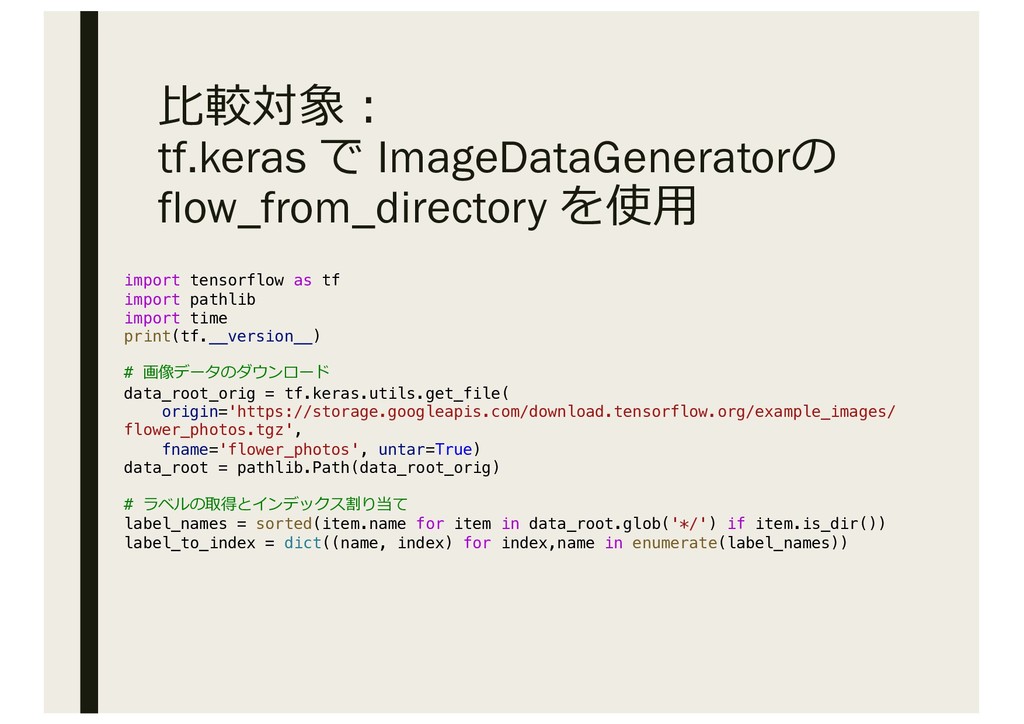
import tensorflow as tf import pathlib import time print(tf.__version__) #
画像データのダウンロード data_root_orig = tf.keras.utils.get_file( origin='https://storage.googleapis.com/download.tensorflow.org/example_images/ flower_photos.tgz', fname='flower_photos', untar=True) data_root = pathlib.Path(data_root_orig) # ラベルの取得とインデックス割り当て label_names = sorted(item.name for item in data_root.glob('*/') if item.is_dir()) label_to_index = dict((name, index) for index,name in enumerate(label_names)) ⽐較対象︓ tf.keras で ImageDataGeneratorの flow_from_directory を使⽤
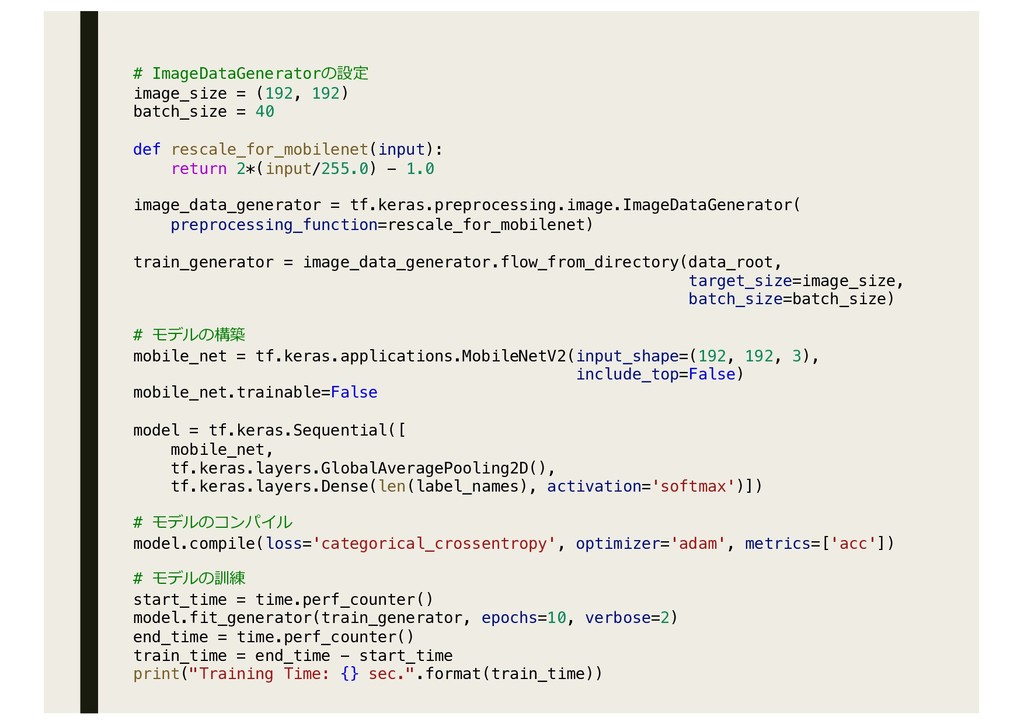
# ImageDataGeneratorの設定 image_size = (192, 192) batch_size = 40 def
rescale_for_mobilenet(input): return 2*(input/255.0) - 1.0 image_data_generator = tf.keras.preprocessing.image.ImageDataGenerator( preprocessing_function=rescale_for_mobilenet) train_generator = image_data_generator.flow_from_directory(data_root, target_size=image_size, batch_size=batch_size) # モデルの構築 mobile_net = tf.keras.applications.MobileNetV2(input_shape=(192, 192, 3), include_top=False) mobile_net.trainable=False model = tf.keras.Sequential([ mobile_net, tf.keras.layers.GlobalAveragePooling2D(), tf.keras.layers.Dense(len(label_names), activation='softmax')]) # モデルのコンパイル model.compile(loss='categorical_crossentropy', optimizer='adam', metrics=['acc']) # モデルの訓練 start_time = time.perf_counter() model.fit_generator(train_generator, epochs=10, verbose=2) end_time = time.perf_counter() train_time = end_time - start_time print("Training Time: {} sec.".format(train_time))
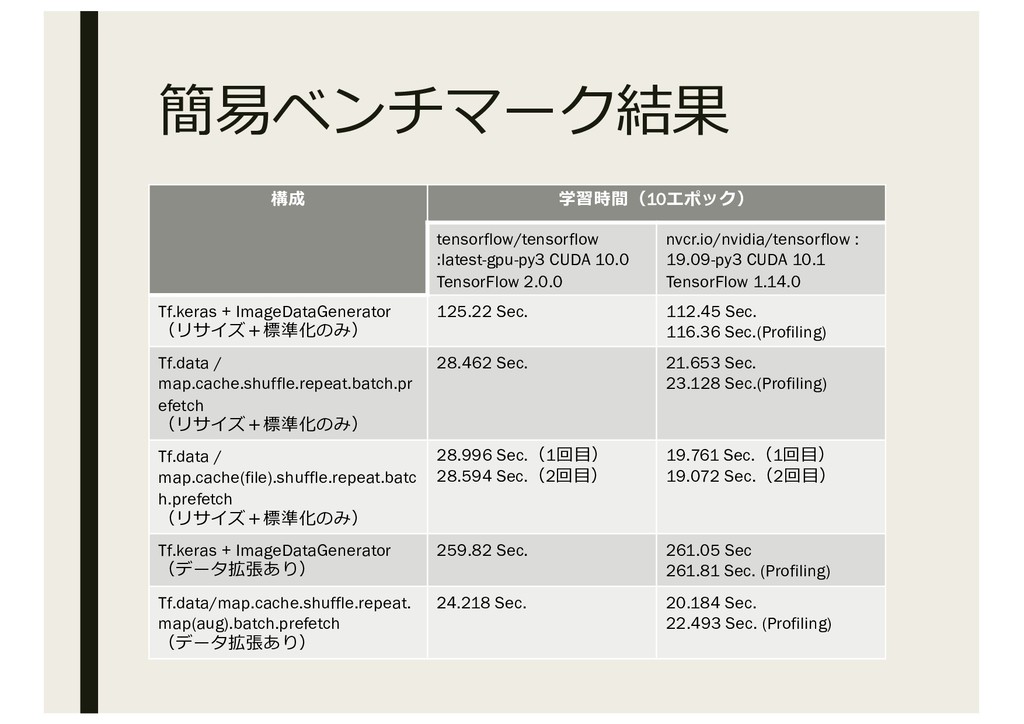
簡易ベンチマーク結果 構成 学習時間(10エポック) tensorflow/tensorflow :latest-gpu-py3 CUDA 10.0 TensorFlow 2.0.0 nvcr.io/nvidia/tensorflow
: 19.09-py3 CUDA 10.1 TensorFlow 1.14.0 Tf.keras + ImageDataGenerator (リサイズ+標準化のみ) 125.22 Sec. 112.45 Sec. 116.36 Sec.(Profiling) Tf.data / map.cache.shuffle.repeat.batch.pr efetch (リサイズ+標準化のみ) 28.462 Sec. 21.653 Sec. 23.128 Sec.(Profiling) Tf.data / map.cache(file).shuffle.repeat.batc h.prefetch (リサイズ+標準化のみ) 28.996 Sec.(1回⽬) 28.594 Sec.(2回⽬) 19.761 Sec.(1回⽬) 19.072 Sec.(2回⽬) Tf.keras + ImageDataGenerator (データ拡張あり) 259.82 Sec. 261.05 Sec 261.81 Sec. (Profiling) Tf.data/map.cache.shuffle.repeat. map(aug).batch.prefetch (データ拡張あり) 24.218 Sec. 20.184 Sec. 22.493 Sec. (Profiling)
PROFILING
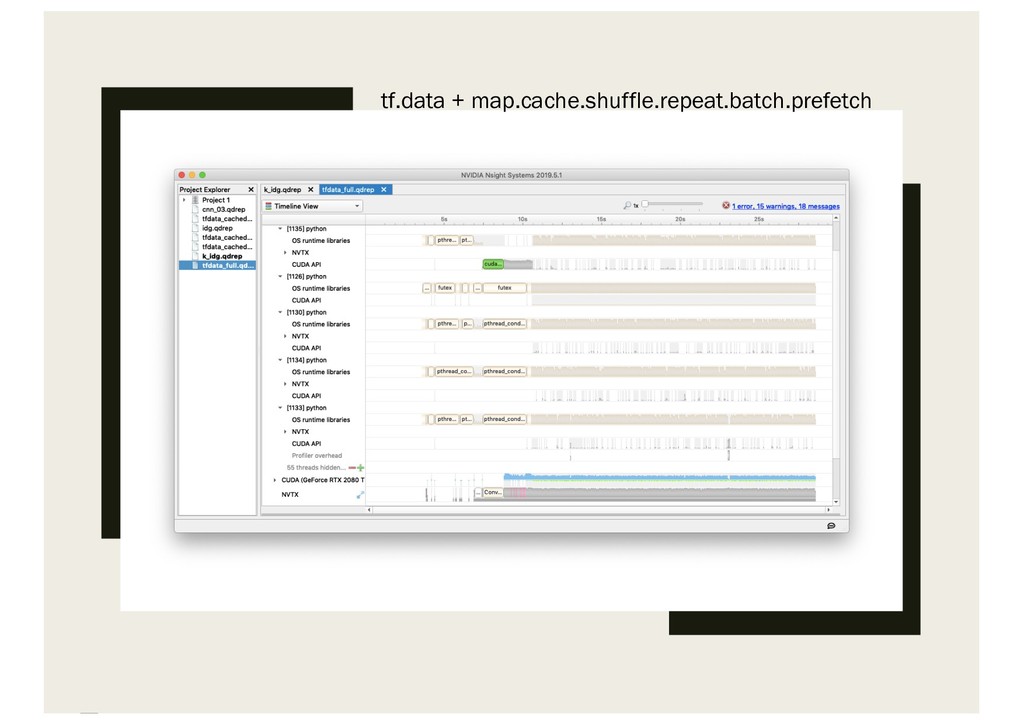
ProfilingでGPUの使⽤状況を 可視化する ▪ かつてはnvprofとNVIDIA Visual Profiler(nvvp)が使われて いたが、最近のGPUでは動かないらしい ▪ NVIDIA Nsight
Systemsを使⽤してプロファイリング ▪ https://developer.nvidia.com/nsight-systems ▪ ローカルシステムやリモートシステムにSSHで接続しても プロファイリング可能だが、今回はDocker環境のため、 CLIのnsysをDocker内で起動してプロファイルを取得した。
tf.keras + ImageDataGenerator
tf.data + map.cache.shuffle.repeat.batch.prefetch


 itagakim
 hamadakoji
 mhlyc
mhlyc
 usanchuu
 koukihosaka
 kakehashi
 yamahiro
 minorun365
 occhi
occhi
 yahonda
 linedevth
 sansantech
 tonyrice
 raygrieselhuber
 greggifford
 charlesmeaden
 schlessera
 cassininazir
 smashingmag
 joshbly
 brad_frost
 sferik
 bethany
 davidcarrasco