Upgrade to Pro — share decks privately, control downloads, hide ads and more …

React はじめの一歩

Avatar for pvcresin pvcresin
February 13, 2018

React はじめの一歩

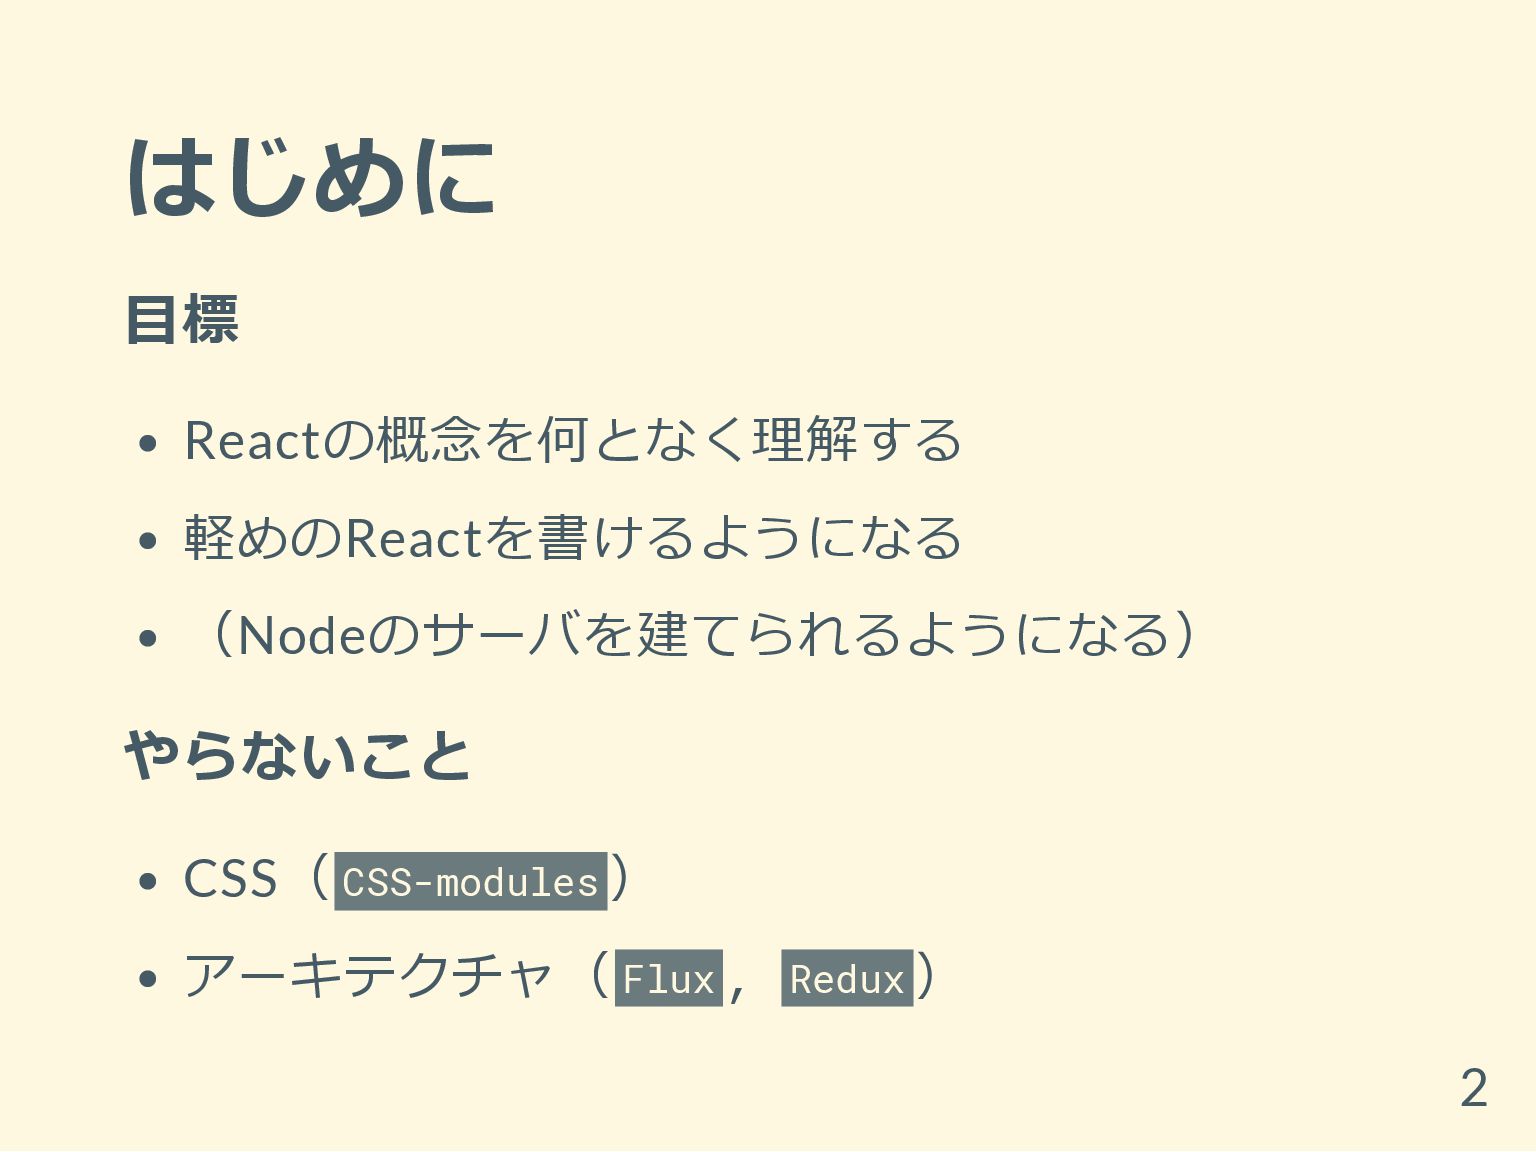
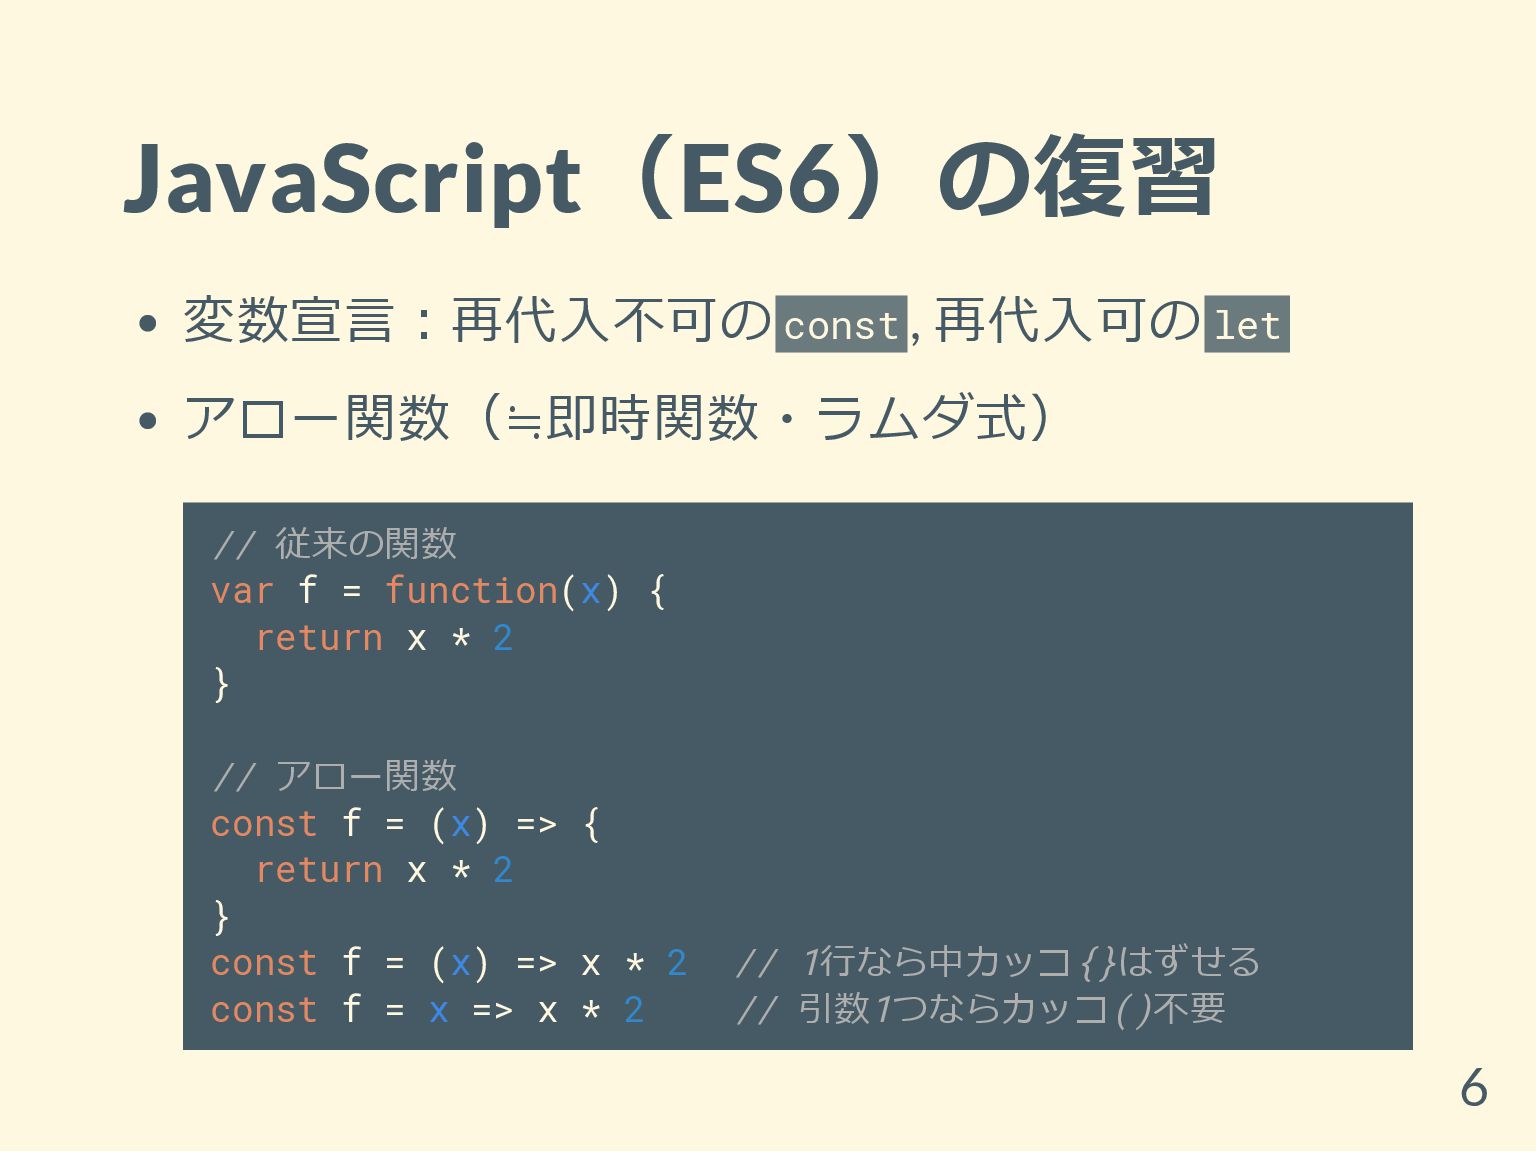
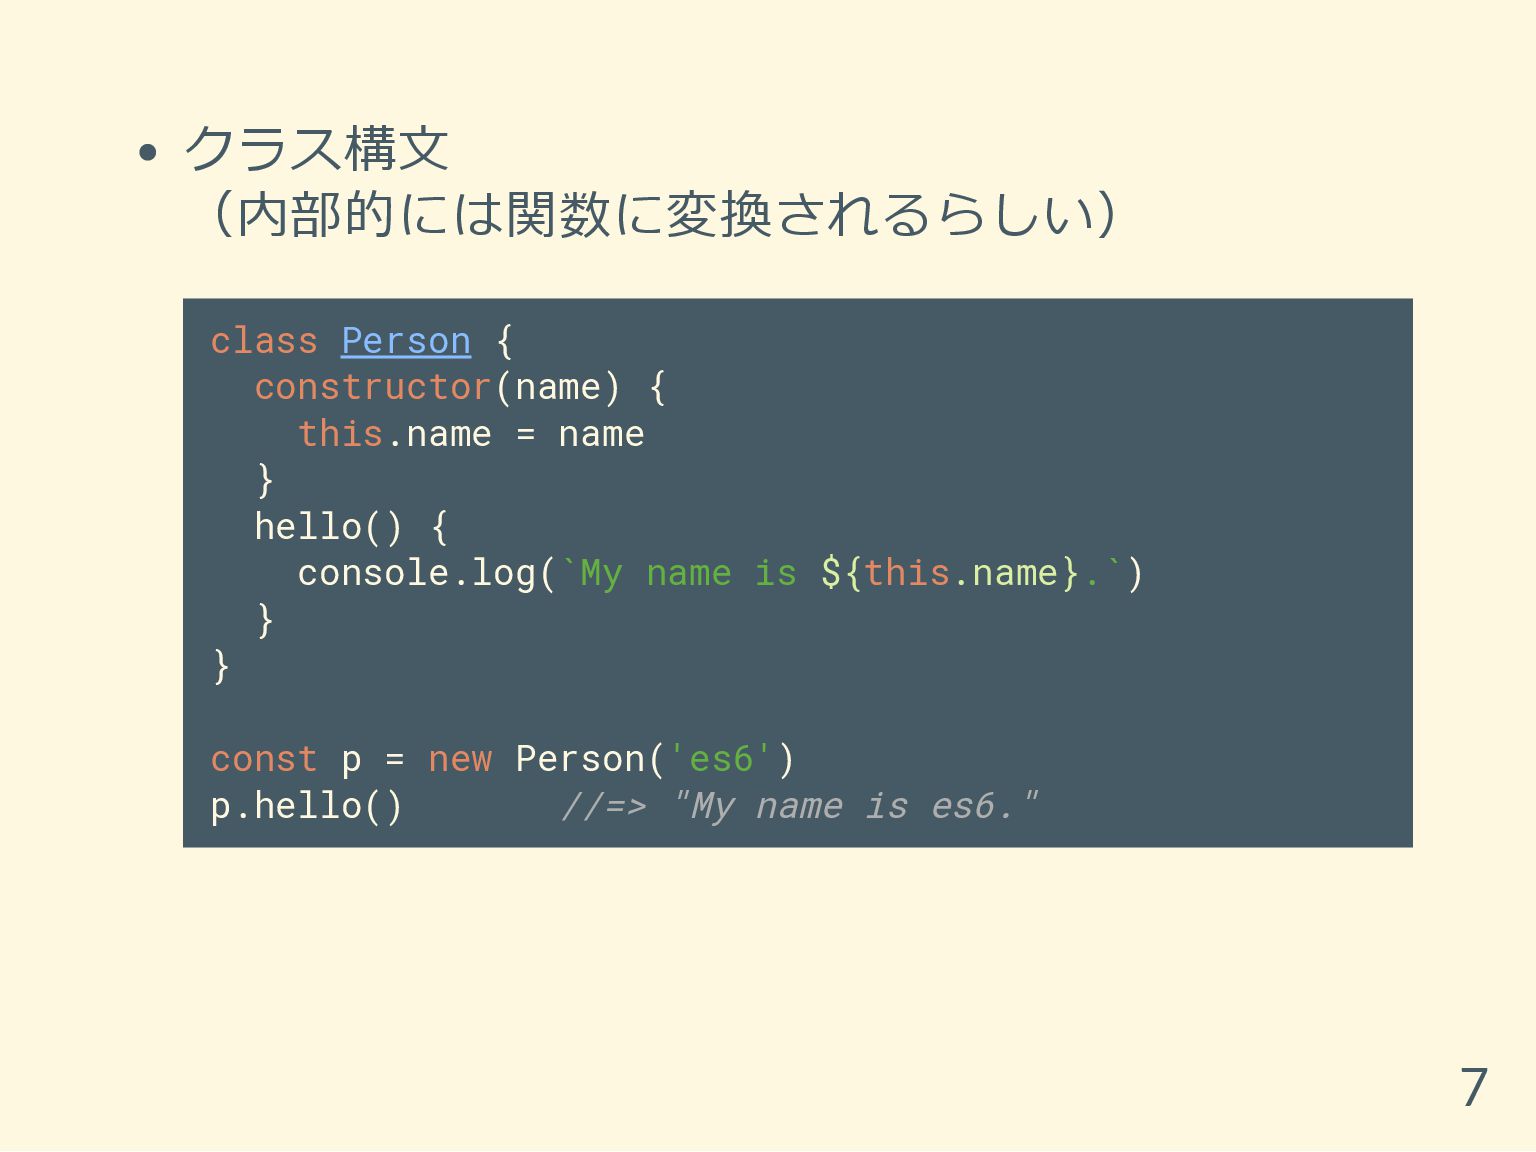
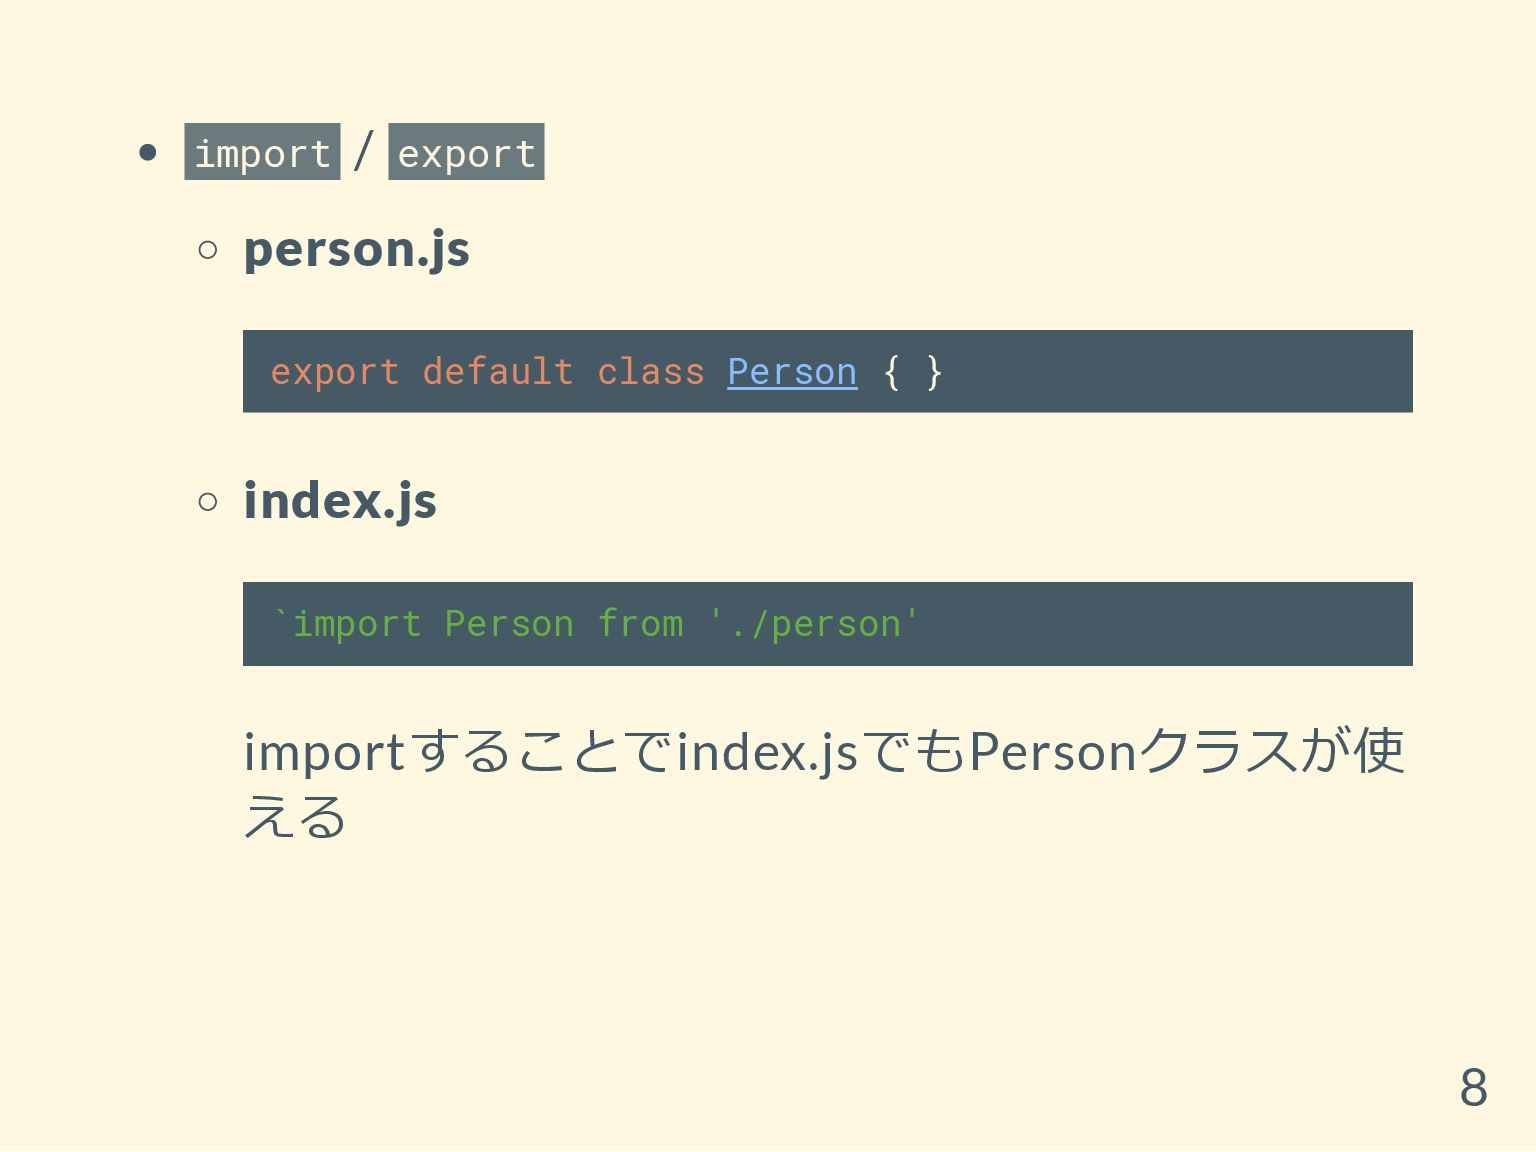
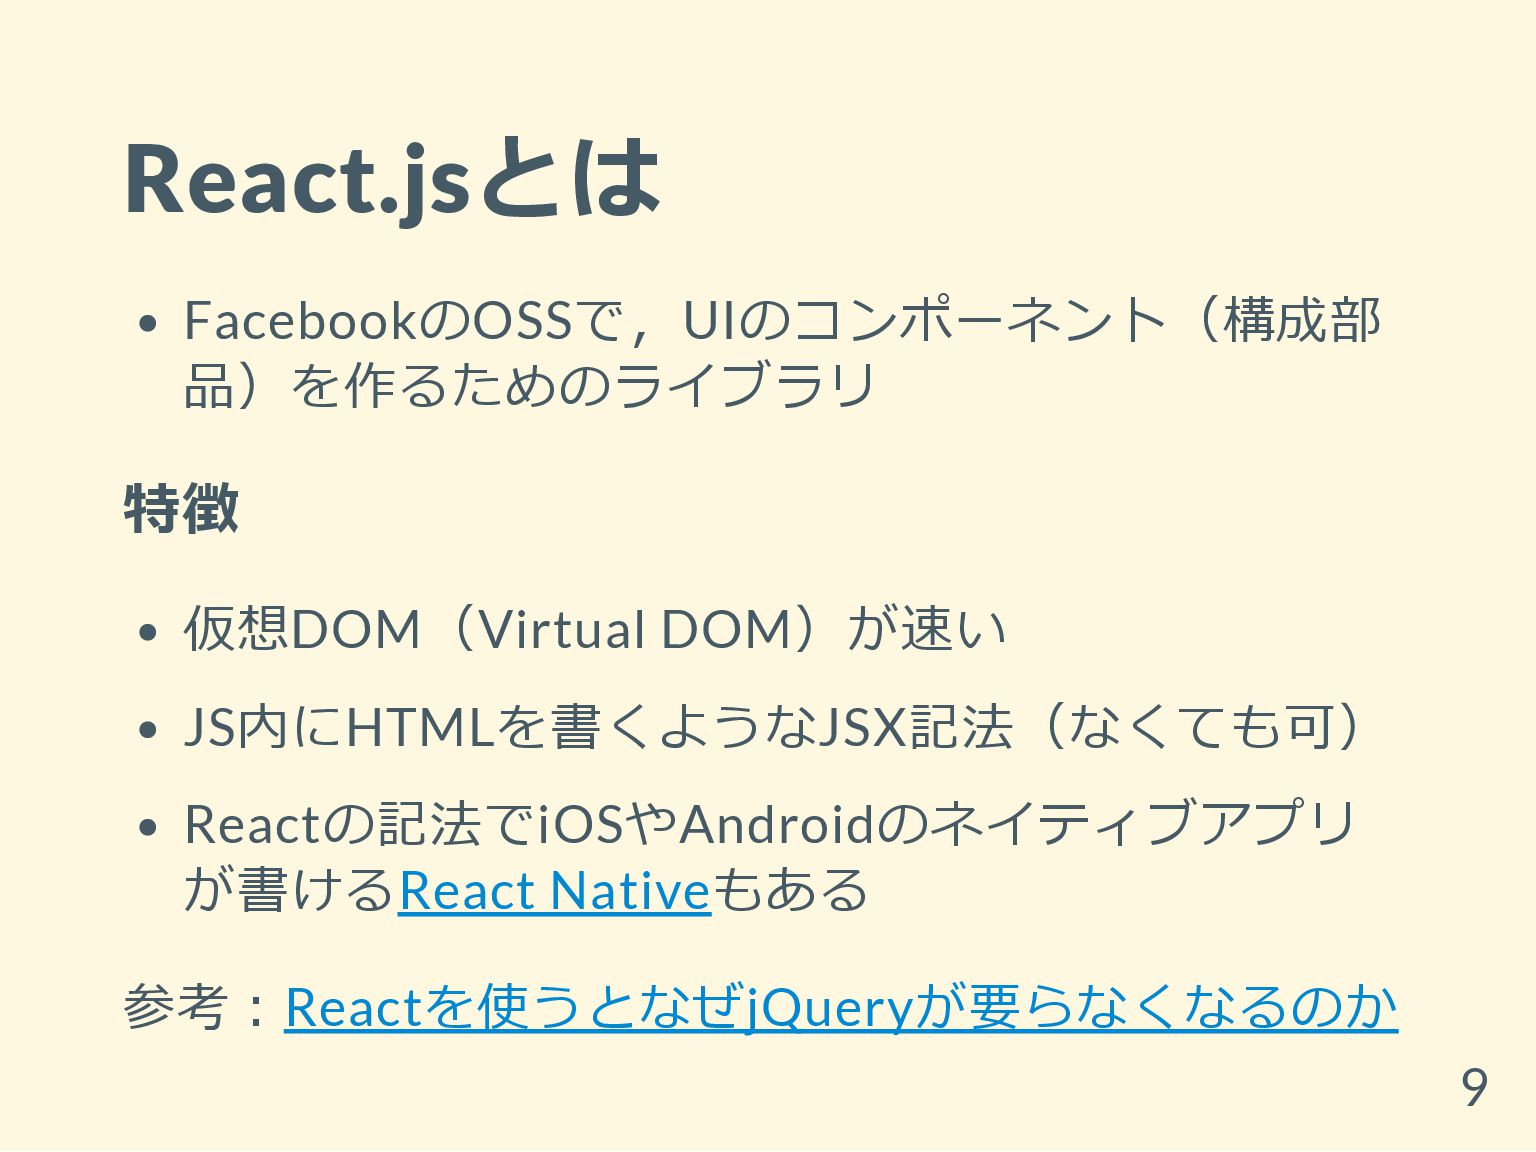
# 目標
- Reactの概念を何となく理解する
- 軽めのReactを書けるようになる
- (Nodeのサーバを建てられるようになる)

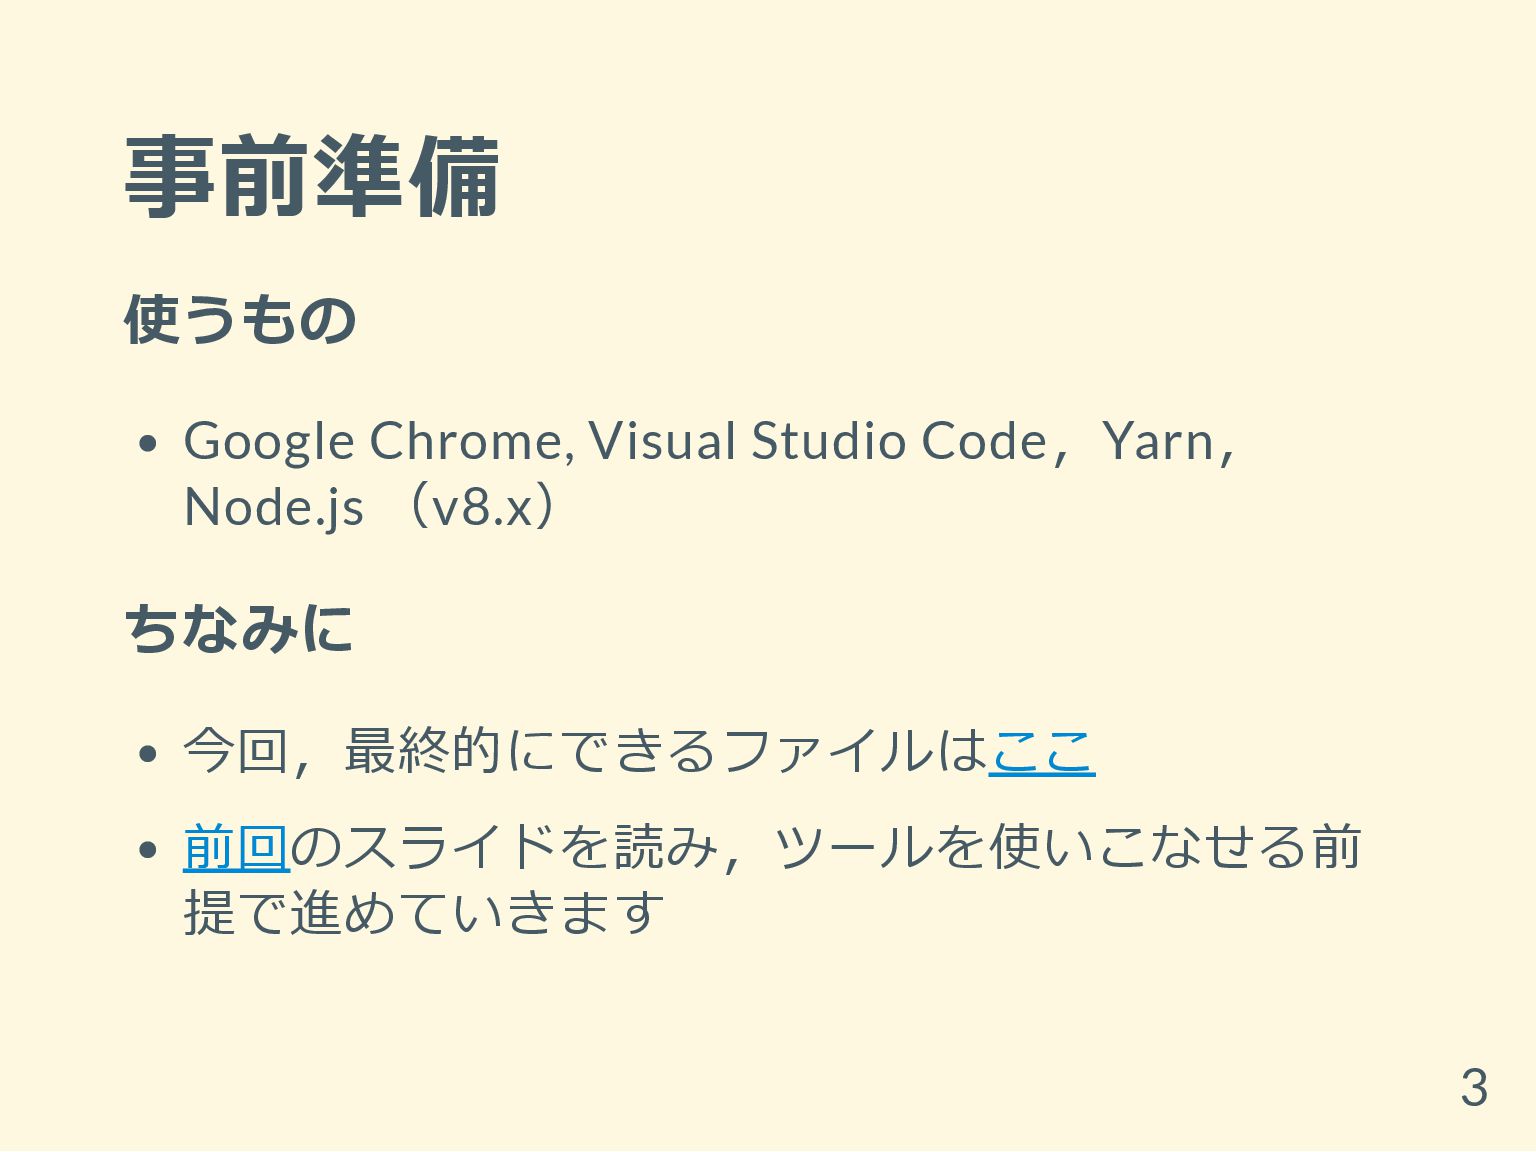
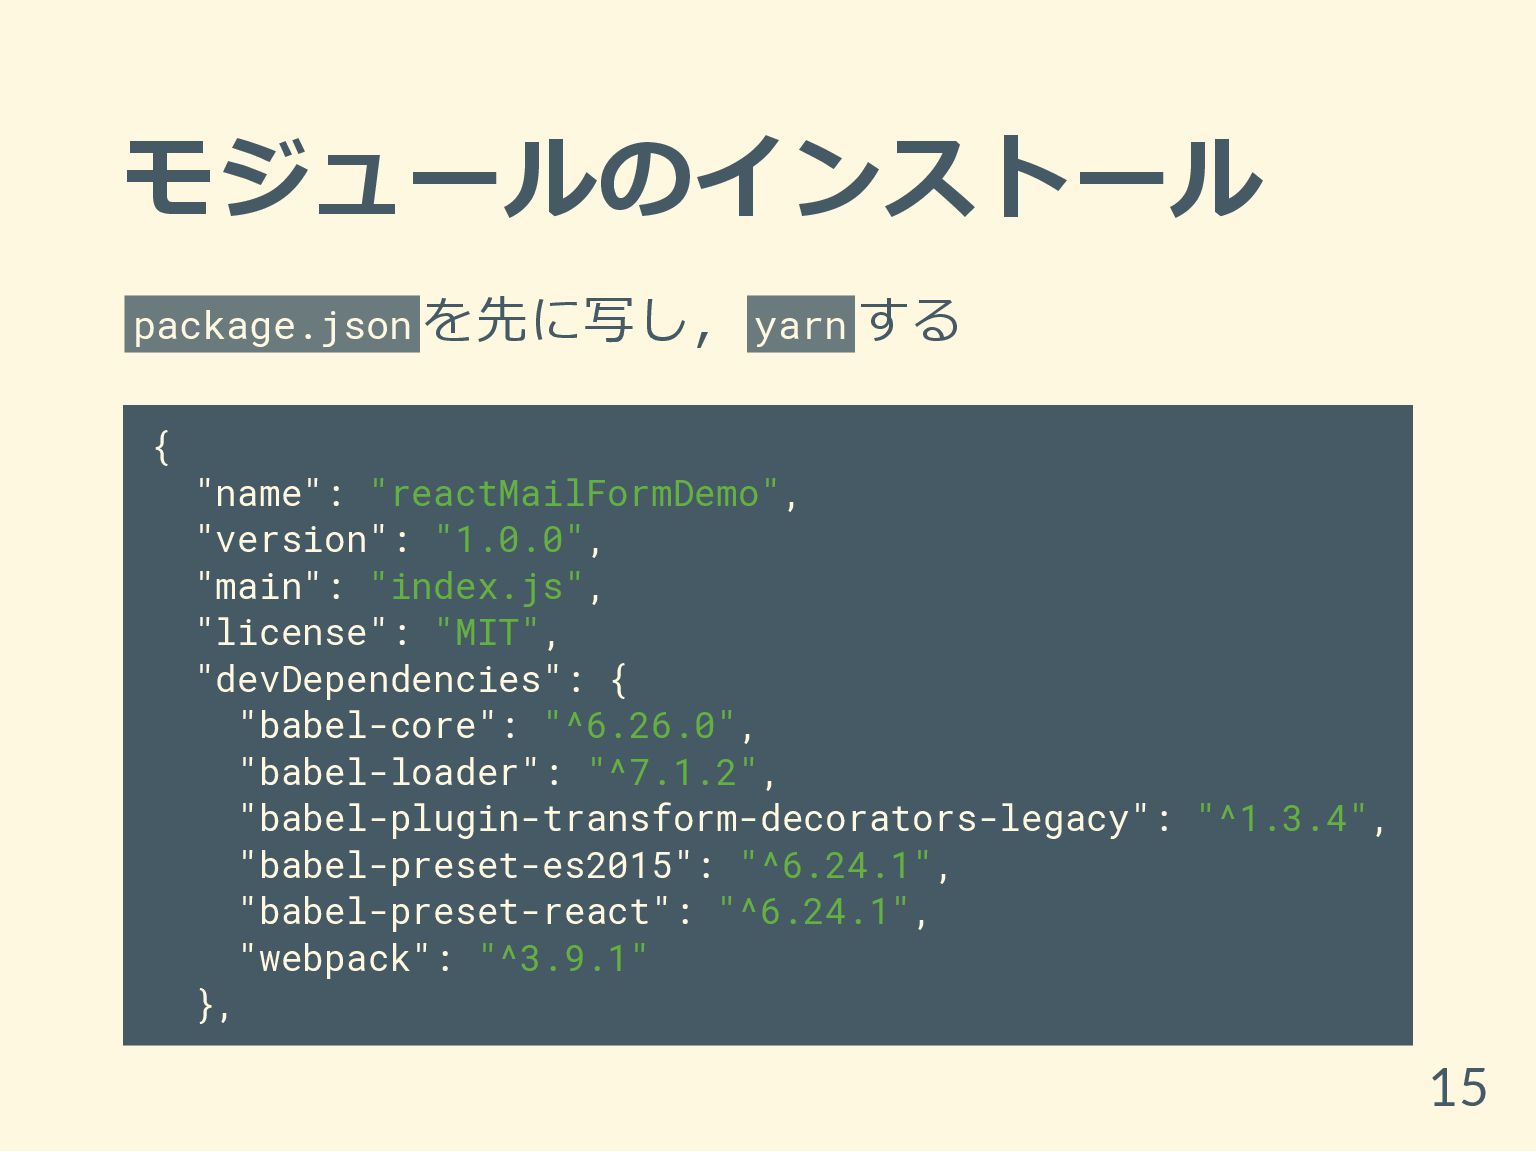
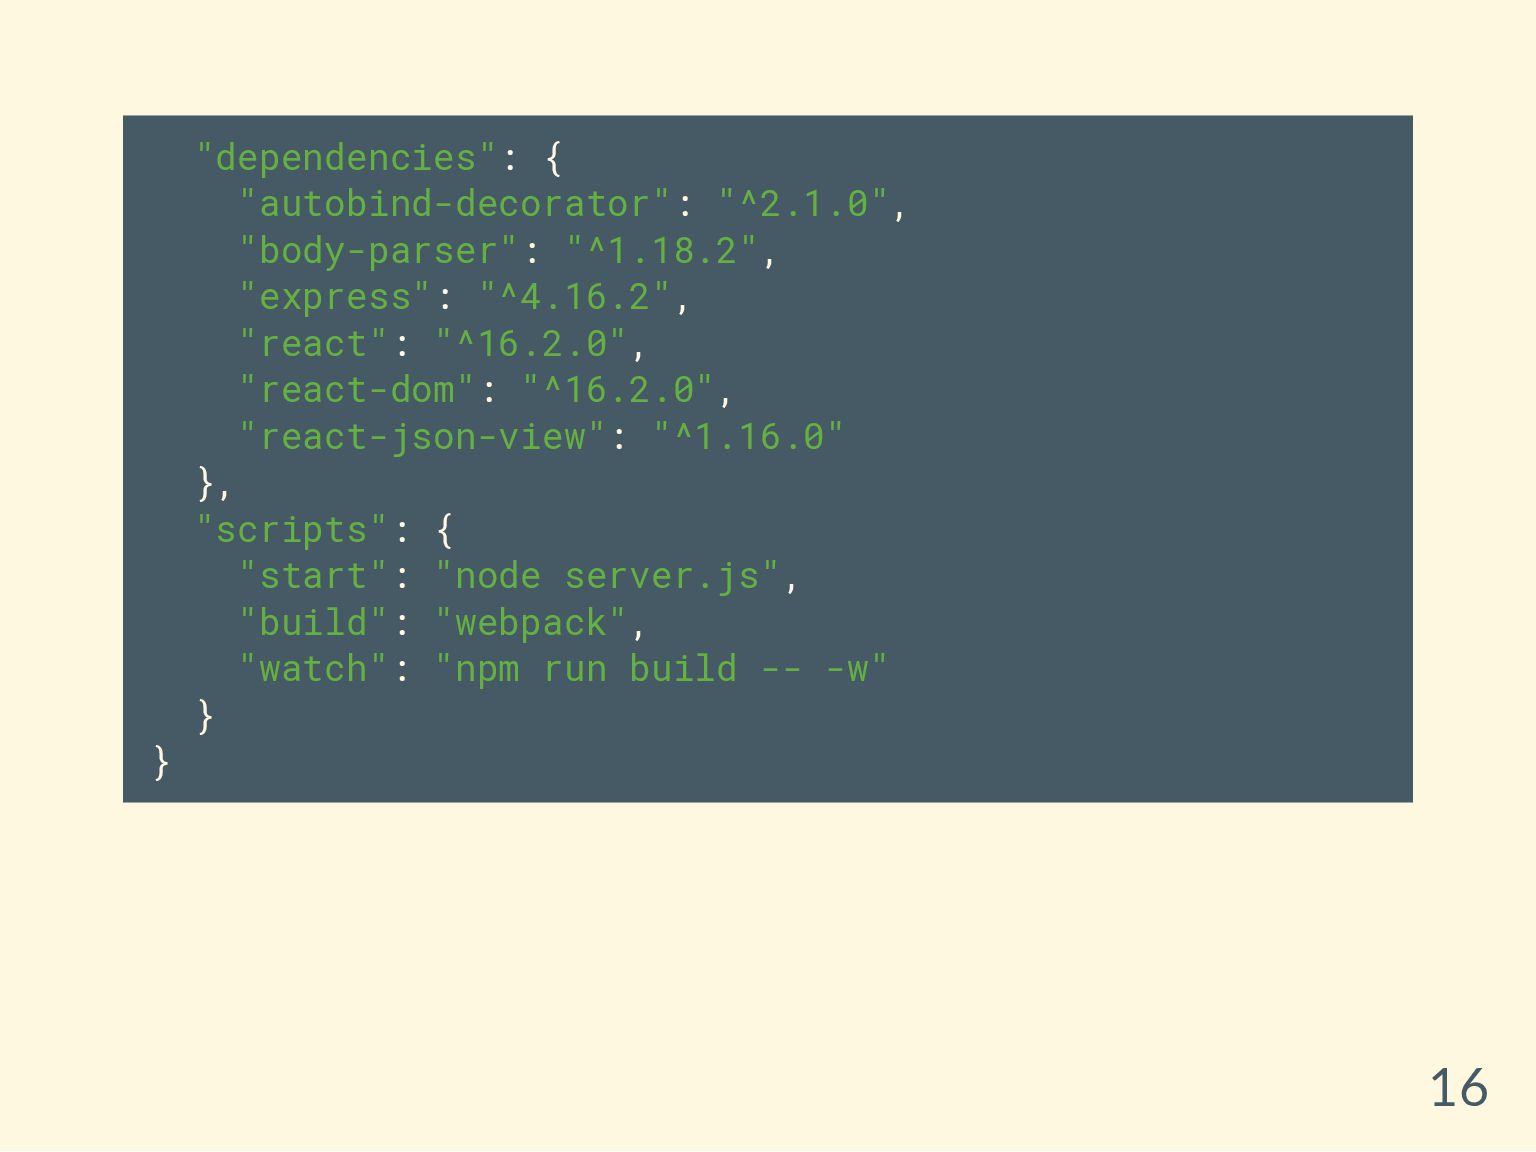
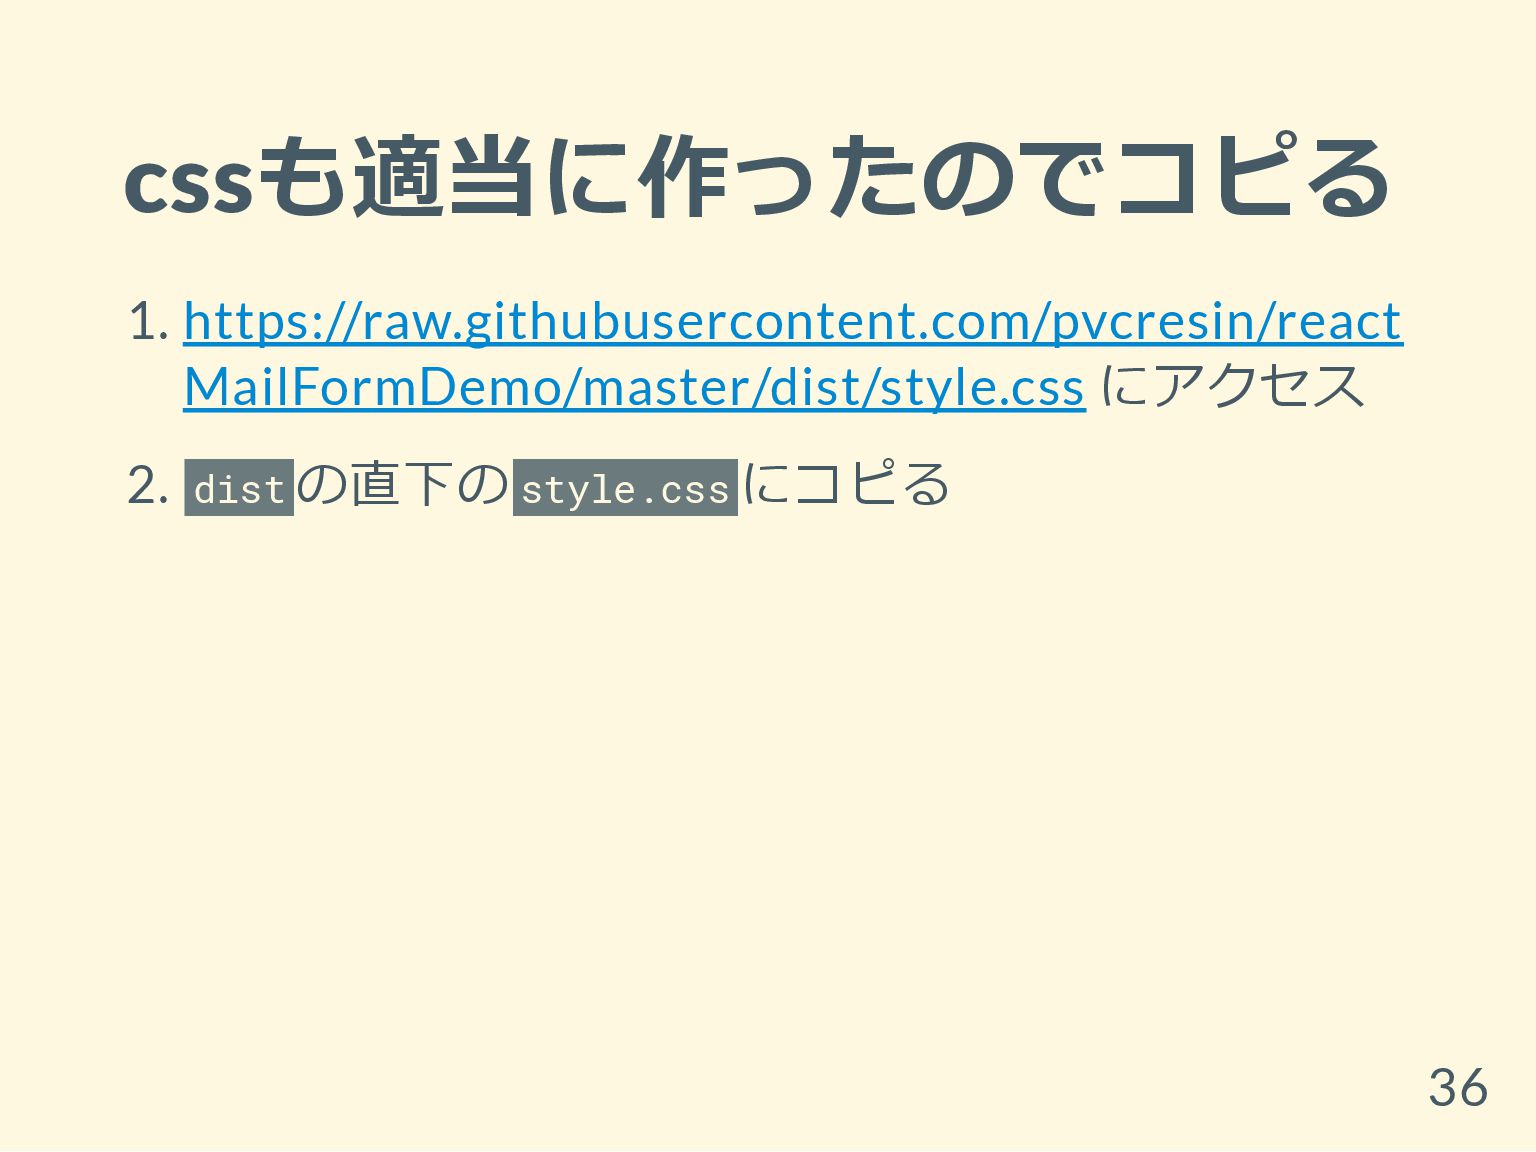
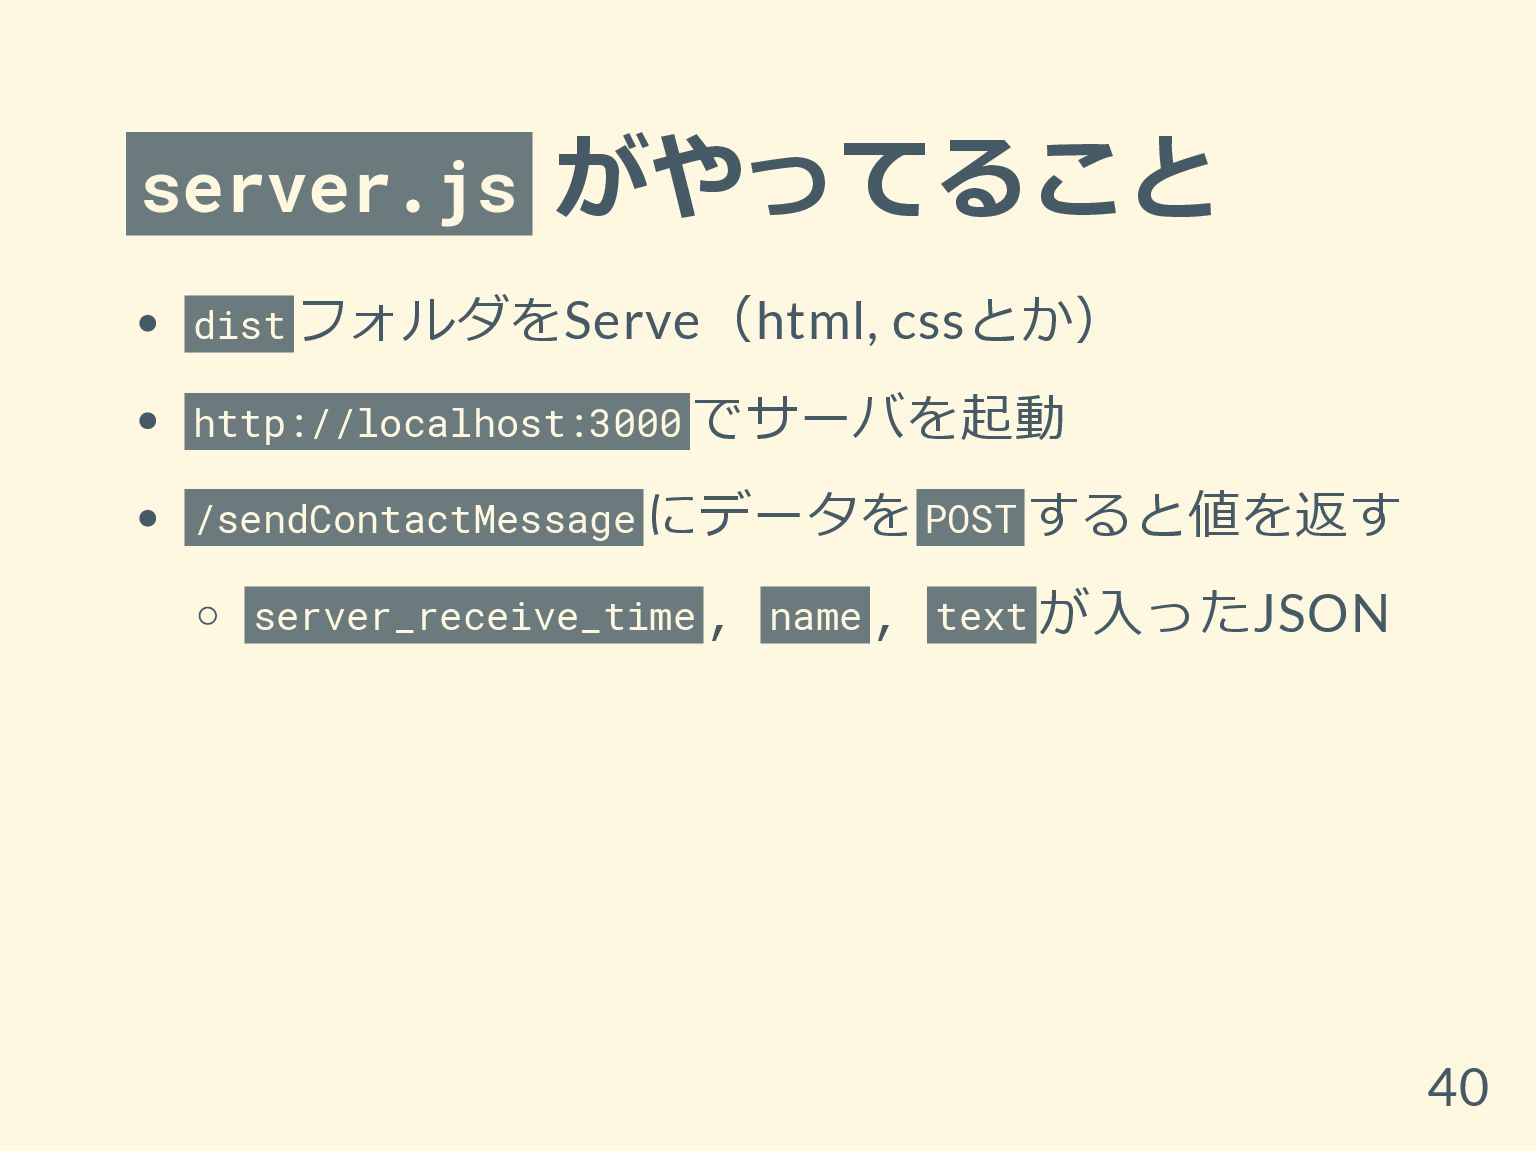
https://github.com/pvcresin/reactMailFormDemo
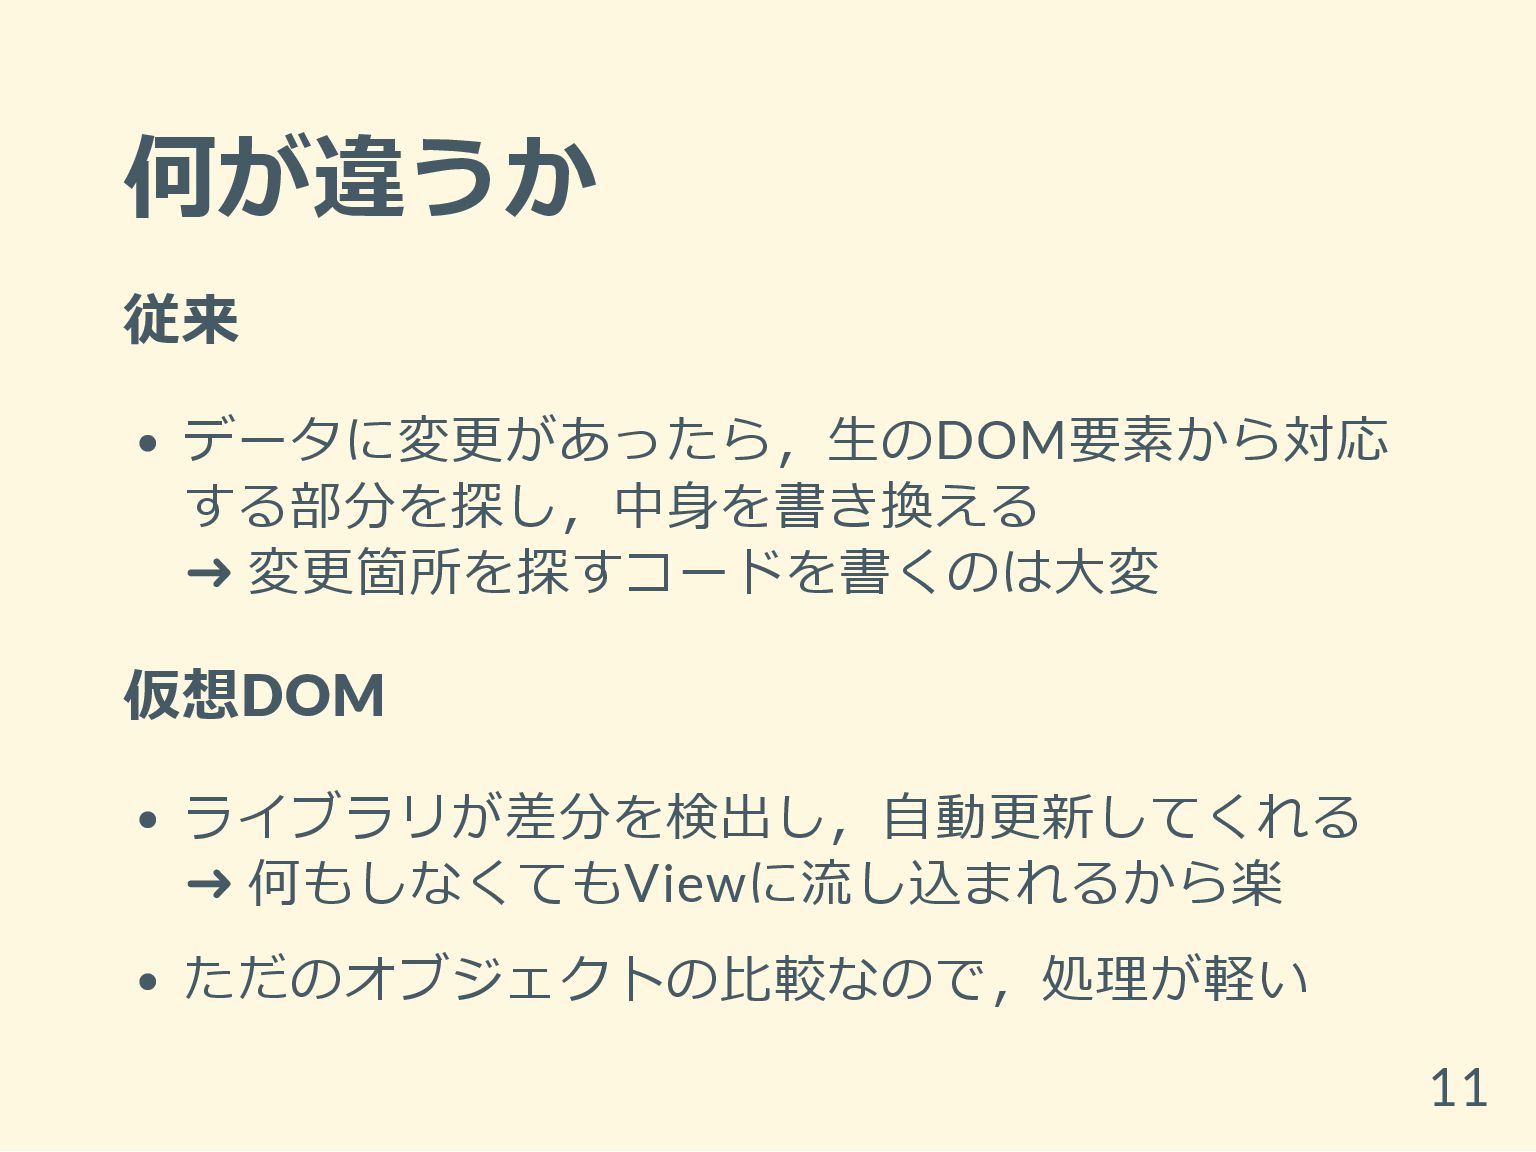
Avatar for pvcresin

pvcresin

February 13, 2018
Tweet

More Decks by pvcresin

Other Decks in Programming

Transcript

  1. 事前準備 使うもの Google Chrome, Visual Studio Code,Yarn, Node.js (v8.x) ちなみに

    今回,最終的にできるファイルはここ 前回のスライドを読み,ツールを使いこなせる前 提で進めていきます 3
  2. Yarnの復習 yarn init = package.jsonを作る yarn = 必要なモジュールを全部一気に入れる yarn add

    xxx = 依存ライブラリ xxx を入れる yarn add -D xxx = 開発用ライブラリ xxx を入れる yarn xxx = npm scriptのタスク xxx を実行 5
  3. JavaScript(ES6)の復習 変数宣言:再代入不可の const , 再代入可の let アロー関数(≒即時関数・ラムダ式) // 従来の関数 var

    f = function(x) { return x * 2 } // アロー関数 const f = (x) => { return x * 2 } const f = (x) => x * 2 // 1行なら中カッコ{}はずせる const f = x => x * 2 // 引数1つならカッコ()不要 6
  4. クラス構文 (内部的には関数に変換されるらしい) class Person { constructor(name) { this.name = name

    } hello() { console.log(`My name is ${this.name}.`) } } const p = new Person('es6') p.hello() //=> "My name is es6." 7
  5. import / export person.js export default class Person { }

    index.js `import Person from './person' importすることでindex.jsでもPersonクラスが使 える 8
  6. 例えば? 画面のリスト [a, b] を 新しいリスト [a, c] に更新 <li>a</li>

    <li>a</li> <li>b</li> --- 更新 --> <li>c</li> 従来 現在の <li> タグを全て取得し,一つ一つを新し いデータと比較して書き換える 生のDOMを使って比較するので処理が重い 仮想DOM 全自動 12
  7. JSX記法 JSの言語拡張,JS内にHTMLタグが書けるイメージ class App extends Component { render() { return

    ( <div>Hello React</div> ) } } render(<App />, document.querySelector('main')) 拡張子は .jsx ( .js でもよさそう) class はJSで予約語のため, className と書く 13
  8. 準備 VSC設定 "editor.formatOnSave": true, "files.trimTrailingWhitespace": true, Chrome拡張 React Dev Tools

    拡張 からファイルへのアクセスを許可しとく プロジェクトフォルダを作り, yarn init -y する 14
  9. モジュールのインストール package.json を先に写し, yarn する { "name": "reactMailFormDemo", "version": "1.0.0",

    "main": "index.js", "license": "MIT", "devDependencies": { "babel-core": "^6.26.0", "babel-loader": "^7.1.2", "babel-plugin-transform-decorators-legacy": "^1.3.4", "babel-preset-es2015": "^6.24.1", "babel-preset-react": "^6.24.1", "webpack": "^3.9.1" }, 15
  10. "dependencies": { "autobind-decorator": "^2.1.0", "body-parser": "^1.18.2", "express": "^4.16.2", "react": "^16.2.0",

    "react-dom": "^16.2.0", "react-json-view": "^1.16.0" }, "scripts": { "start": "node server.js", "build": "webpack", "watch": "npm run build -- -w" } } 16
  11. 開発モジュール webpack : JS合体君・バンドラ babel-core : JSを変換する(バベる)君 babel-loader : webpack上でバベれるようにする君

    babel-preset-es2015 : ES6 ➜ ES5 babel-preset-react : JSX ➜ 普通のJS babel-plugin-transform-decorators-legacy : @ (デコレータ)を使えるようにする君 18
  12. jscon g.json { "compilerOptions": { "emitDecoratorMetadata": true, "experimentalDecorators": true, "module":

    "es6", "target": "ES6" }, "exclude": [ "node_modules" ] } プロジェクトルートに置いておく 今後一切触らない 20
  13. index.html <!DOCTYPE html> <html lang='ja'> <head> <title>Mail Form</title> <meta charset='UTF-8'>

    <link rel='stylesheet' href='style.css'> </head> <body> <main></main> <script src='index.js'></script> </body> </html> style.cssは空で大丈夫 21
  14. webpack.con g.js src/index.jsx を dist に吐き出す JSでimportする時に拡張子 js , jsx

    を省略する const webpack = require('webpack') const path = require('path') module.exports = { entry: { index: path.join(__dirname, './src/index.jsx') }, output: { path: path.join(__dirname, 'dist/'), filename: '[name].js' }, 22
  15. module: { rules: [{ test: /\.js|jsx?$/, exclude: /node_modules/, loader: 'babel-loader',

    options: { presets: ['react', 'es2015'], plugins: ['transform-decorators-legacy'] } }] }, resolve: { extensions: ['.js', '.jsx'] } } jsxのファイルに書かれたreactやらes6やらデコレ ータを普通のJSに変換する 23
  16. index.jsx import React, { Component } from 'react' import ReactDOM,

    { render } from 'react-dom' render(<h1>React</h1>, document.querySelector('main')) index.html 内の main タグに h1 タグをマウント(レンダリング)する 24
  17. Reactを動かしてみる npm script yarn build : webpackでJSを1度だけビルド yarn watch :

    変更を検知してビルドし直し続ける yarn watch して dist/index.html を開いてみよう h1タグがレンダリングされているはず 25
  18. コンポーネントを作る src/components/App.jsx を作る import React, { Component } from 'react'

    import ReactDOM from 'react-dom' export default class App extends Component { constructor(props) { super(props) } render() { // 実際のAppタグの中身 return ( <div>App</div> ) } } 26
  19. index.jsx import React, { Component } from 'react' import ReactDOM,

    { render } from 'react-dom' import App from './components/App' render(<App />, document.querySelector('main')) yarn watch して,ブラウザをリロードしたら main タグの中に App タグがマウントされる 27
  20. autobind-decorator を使う イベントの度に .bind(this) を書かなくてもOKに import autobind from 'autobind-decorator' //

    importして @autobind // ってつけると submit() { /* 処理 */ } // .bind(this)がなくなってスッキリ <button onClick={this.submit}>submit</button> 29
  21. Props 親コンポーネントから渡されたプロパティ(不変) 例:Todoのリストを表示するアプリ App ➜ (list) ➜ TodoList ➜ (text)

    ➜ Todo Propsの渡し方 <Todo text='買い物' /> Stateを持たないコンポーネントは関数でも書ける const Todo = props => <div>{props.text}</div> 30
  22. Stateを使ってみる constructor(props) { super(props) this.state = { // stateを宣言&初期値を設定 name:

    '' } } @autobind editName(e) { // イベントe -> テキストをstateのnameに保存 this.setState({ name: e.currentTarget.value }) } <input type='text' onChange={this.editName} value={this.state.name} /> コンポーネント内のデータと見た目が結びついた 32
  23. メールフォームを作る これまでを踏まえて,Stateに name と text を持ち, 見た目と結びついたコンポーネントを書いてみる import React, {

    Component } from 'react' import ReactDOM from 'react-dom' import autobind from 'autobind-decorator' export default class App extends Component { constructor(props) { super(props) this.state = { name: '', text: '' } } 33
  24. @autobind editName(e) { this.setState({ name: e.currentTarget.value }) } @autobind editText(e)

    { this.setState({ text: e.currentTarget.value }) } @autobind submit() { alert( `氏名: ${this.state.name} \n内容: ${this.state.text}` ) } 続く 34
  25. render() { return ( <div> <p> <label>name</label> <input type='text' onChange={this.editName}

    value={this.state.name} /> </p> <p> <label>text</label> <textarea onChange={this.editText} value={this.state.text}></textarea> </p> <button onClick={this.submit}>submit</button> </div> ) } } 35
  26. server.js をプロジェクトルートに作成 const express = require('express') const bodyParser = require('body-parser')

    express() .use(express.static('dist')) .use(bodyParser.urlencoded({ extended: true })) .use(bodyParser.json()) .post('/sendContactMessage', (req, res) => { console.log(req.body) res.json({ server_receive_time: new Date().toString(), name: req.body.name, text: req.body.text, }) }) .listen(3000, () => { console.log('http://localhost:3000') }) 39
  27. サーバを起動 1. yarn watch とは別のターミナルで yarn start yarn watch :

    jsxをjsに変換し続ける yarn start : dist フォルダをserveし続ける 2. http://localhost:3000 にアクセス あとはクライアントからデータを送信するだけ 41
  28. 何が良いか 非同期処理を行う関数A, B, Cがあるとする BにはAの結果が必要,CにはBの結果が必要 A(function(a) { // Aの結果が帰ってきた時のCallback B(a,

    function(b){ // Bの..Callback C(b, function(c){ // Cの...Callback done(c) // 最終的な結果 }) }) }) どんどんネストが深くなっていく... 43
  29. fetchとは GETとかPOSTする時にPromise型で処理できる関数 使い方 fetch(url, { method: 'POST', body: /* 送信データ

    */ }).then(response => { return response.json() // 結果をJSON形式に変換 }).then(json => { /* 結果のJSONを使った処理 */ }) お疲れさまXMLHttpRequest、こんにちはfetch 45
  30. 通信準備 this.state = { name: '', text: '', result: {}

    } stateに result を定義 初期値は空のオブジェクト {} を設定 46
  31. fetchを使ってみる @autobind submit() { const url = './sendContactMessage' fetch(url, {

    headers: { 'Content-Type': 'application/json' }, method: 'POST', body: JSON.stringify({ name: this.state.name, text: this.state.text }) }) .then(response => response.json()) .then(json => { this.setState({ result: json }) }) } 47
  32. 通信完成 1. submitボタンを押す 2. POST 3. サーバからレスポンス 4. JSONに変換 5.

    stateの result に保存 Dev-Tool のReactタブで確認! できた~~~~!! 48
  33. react-json-viewを使ってみる import ReactJson from 'react-json-view' <ReactJson src={this.state.result} /> を button

    タグの後に入れてみる Propsとして src で渡したJSONの構造が表示される 50